1977 Porsche 924 Resto-Mod Project
![]()
A detailed chronicle of resurrecting an old Porsche and putting it back on the road...
OR
Flat Possum Motor Sports strikes again!
(Click on the pictures for
high res views!)
I had wanted a Porsche 911 since I was a kid. But looking at today's prices on them, it's enough to make you shake your head and run away – FAST! My dream Porsche tends to run over 100 grand on eBay motors. So it is evident, I won't be getting one of those anytime soon...
Not to mention, today's Porsche’s are technological marvels and are very, very complicated. I wanted something older, simpler and something that “I” could actually work on... I did NOT want electric windows, electric locks, AC and power steering! I wanted old school, light and something we could easily make a race car out of... Something we could take out and bash on it a little...
The 911's had become a pipe dream... A very expensive and "out of reach" pipe dream... We needed a Porsche that we didn't have to worry about resale value, originality or any of that. We needed something we could cut up, punch holes in and modify for our needs. We wanted something inexpensive enough so that "IF" we ended up crashing it and totalling it, we weren't out all that much. Something that could be my sons learning platform. Not a show car or museum piece. It was to be a 16 year olds introductory entry level race car that he could be proud of. And you know, something that dad could drive around town too.
But there was hope, as I noticed that the 924/928/944's were relatively reasonable. Some of them were downright affordable! Probably because most die hard Porsche freaks don't like front engined, water cooled cars. The 924 was Porsches first front engined water cooled sports car offering. Which makes them sort of the red headed bastard step child in the Porsche family. But with a near 50/50 weight distribution, they were exactly what I was looking for. The early base 924's don't have electric windows, locks or power steering. Most of them are downright reasonably priced on the used market on-line.
My son had showed some interest in racing. I could no longer drag race my supercharged american made monsters because the local drag strip shut down and for health reasons. (Getting old sucks!) But that wouldn't stop me from helping my son get a taste of motor sports. The SCCA solo events looked like a LOT of fun, easy to get into and he wouldn't have to worry about rubbing fenders on the race track with other people. Solo events put you out in a huge parking lot going around a course made of little orange cones and your only real enemy is the CLOCK!
You have to admit, getting my son involved in SCCA is better than him playing Grand Theft Auto on the X-Box! My son did a great job of restoring an old Crown Vic cop car for his daily driver, with a lot of help. I figured he was ready for a new learning platform project – something he could learn from and something that would be fun to take out to the track. Something purpose built and something that could be a real race car for solo events – as well as something that could be driven on the street. AND, something he could learn how to properly drive a stick shift in...
And best of all... We would rebuild an old Porsche and get it back on the road again!
The project begins... September 2016
I started looking around and found a basket case of a Porsche 924 up in a little town called New Braunfels, Texas at a cool little used car lot with lots of fun toys - randyadamsinc.com. I found it via listingallcars.com. It didn't run, but it was relatively complete and the price was right. (i.e. CHEAP!) It followed us home on a trailer thanks to a nice guy at the dealership who coincidentally wanted some extra cash and fortuitously had a trailer already hooked up to his truck. My last race car started out as 500 dollar car, this one was just like that, a little more than that - I am just calling it "adjusted for inflation"... (And it was a Porsche after all, aren't they supposed to be expensive?!?)
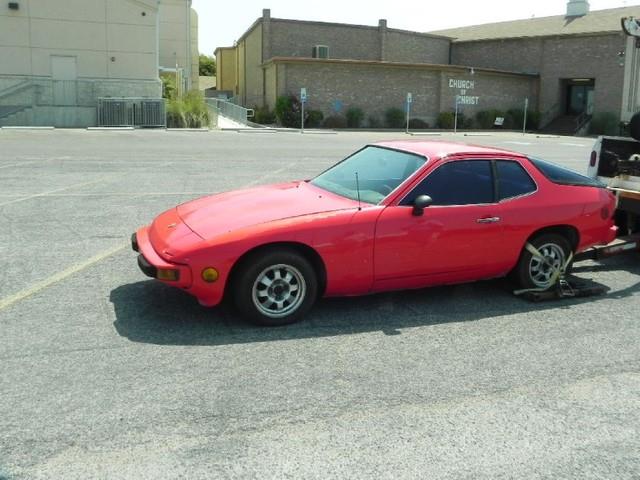
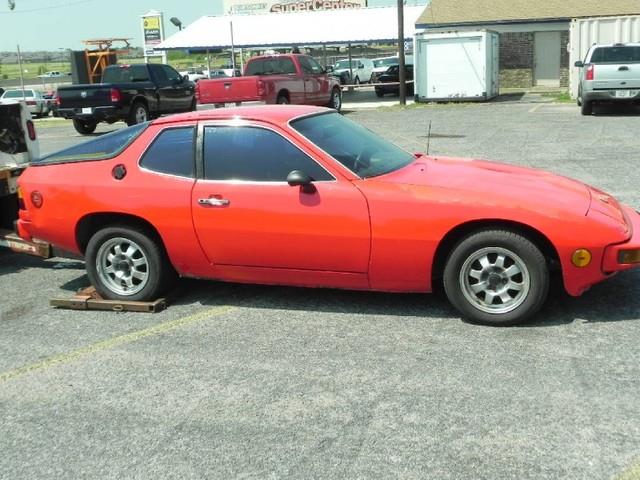
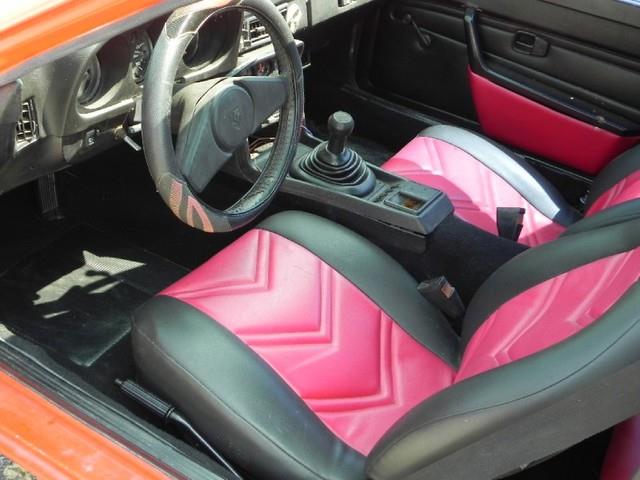
It was red, with a tired, spider cracked and chipped up MAACO paint job but the interior was in half decent shape - even though the red inserts in the seats had faded to a "hot pink" color in the hot Texas sun. Red wasn't our first choice but it's better than black down here in Texas. Besides, the last couple of $500 race cars I have bought were red, so why break tradition? It looked to be pretty complete and all there... Which was important! It's easier to take something apart and put it back together than it is to start with a bunch of parts with no idea how the factory assembled it originally...
Once we got it home, and put it up on jack stands, the ugly truth revealed itself – it hadn't moved since the mid 1980's for good reason... The fuel injection system was toast. The wiring had been hacked up and modified by someone that wasn't a mechanic and every single piece of rubber under the car was about 20 years past its expiration date. Half the brakes were locked up and the other half didn't work! The suspension was downright tired. It was a death trap waiting to happen. Once we got it up on a lift, we found collision damage that had been repaired rather "half-assedly". But luckily, nothing that couldn't be fixed!
Which, was exactly what I wanted as a learning platform for my son... Something for him to tear apart and fix up! Yes, it was going to be expensive to restore. Yes, it was going to take some (a lot) mechanical, interior, and some paint and body work. But he would get to take it all apart down to a shell and put it all back together again with all new racing parts and we would get to know every inch of that car when we were done!
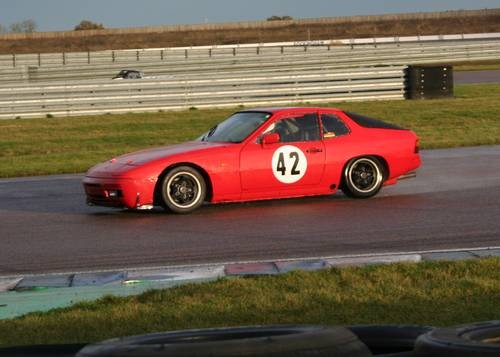
I already knew what I wanted it to look like... Sort of like the car above but with a carbon fiber look hood, roof and possibly the doors... A little paint, a lot of work and some car wrap film and the red headed mistress in the barn would be looking good again... I can wrap the car in vinyl for $300-600 bucks, instead of 4 grand for a flawless paint job at some body shop. If we feel like changing colors, a few hours with a heat gun and we can just peel it right back off! I found film on ebay in a plethora of colors, but "Candy metallic red" and 5D black and silver carbon fiber film caught my eye. Every single bit of chrome on this thing will become black. Leaving us with a pretty mean looking little race car to go play with...
09/29/2016 - First things first... I got online and ordered the Haynes manual AND the Chiltons manual for this car. I did a lot of research. I made a wish list on eBay and Amazon - and was amazed at how much was still available from all over the place for this car. And at the same time, disappointed how little there was available for this specific car. It was going to be a "challenge"!
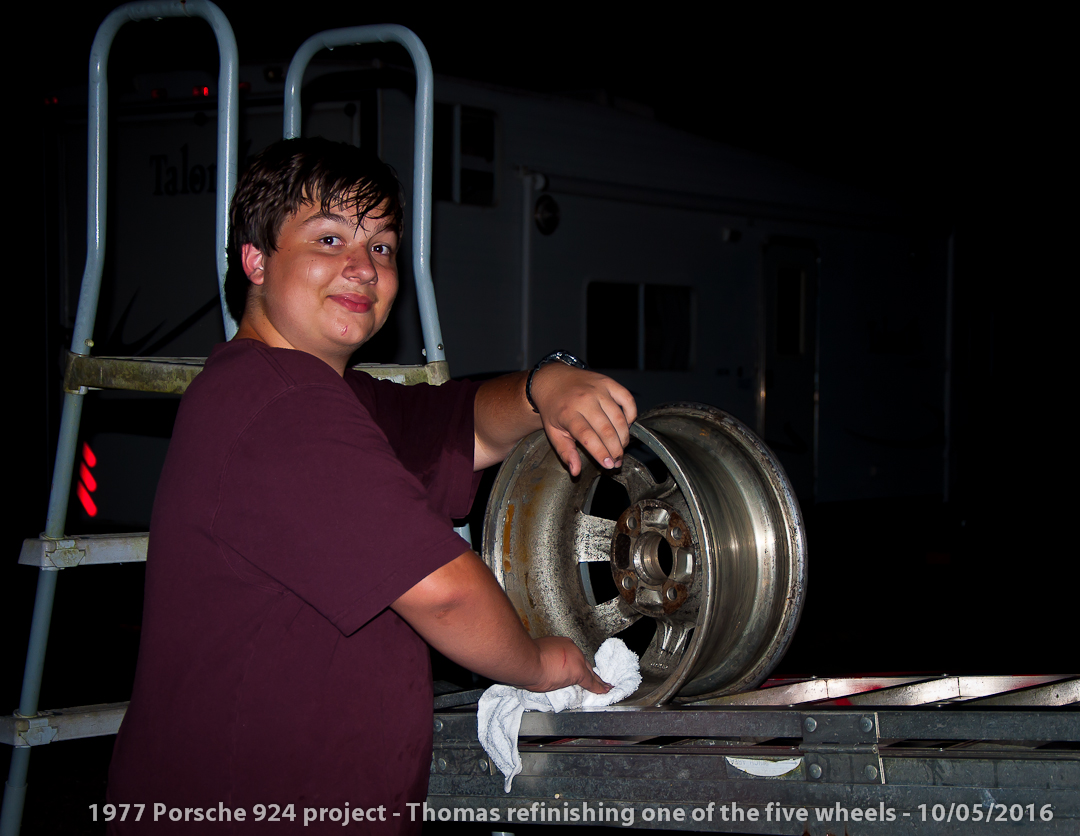

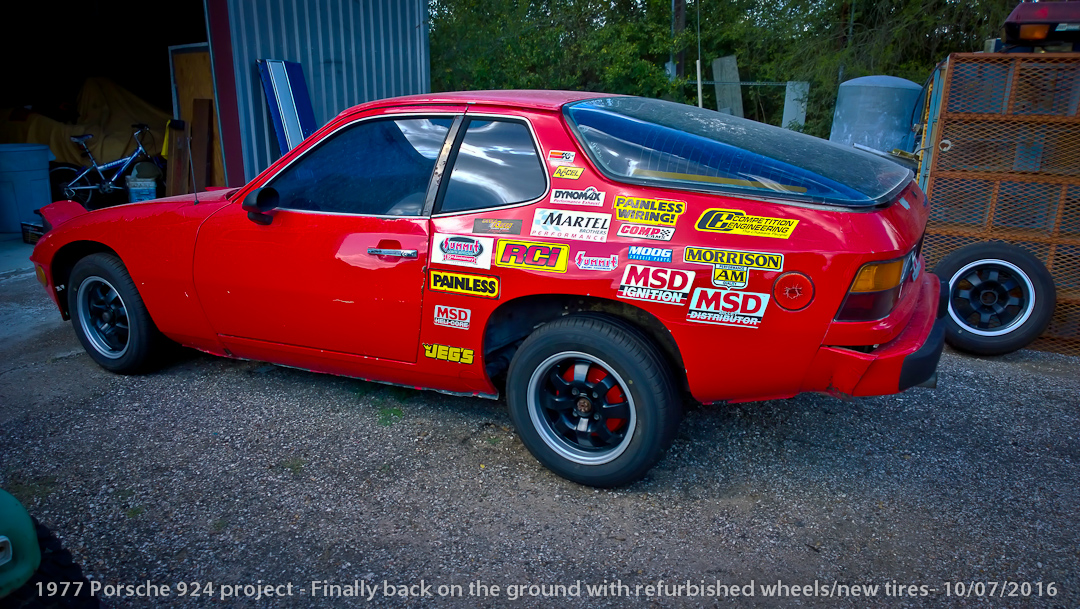
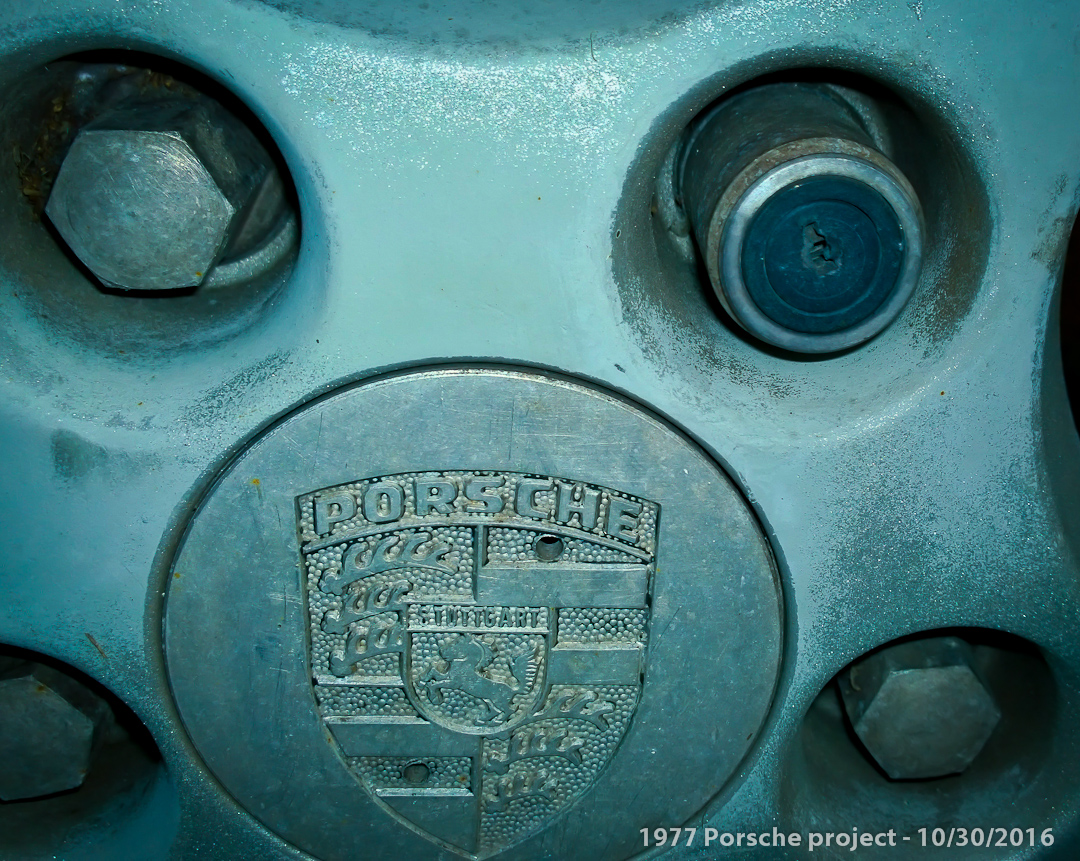
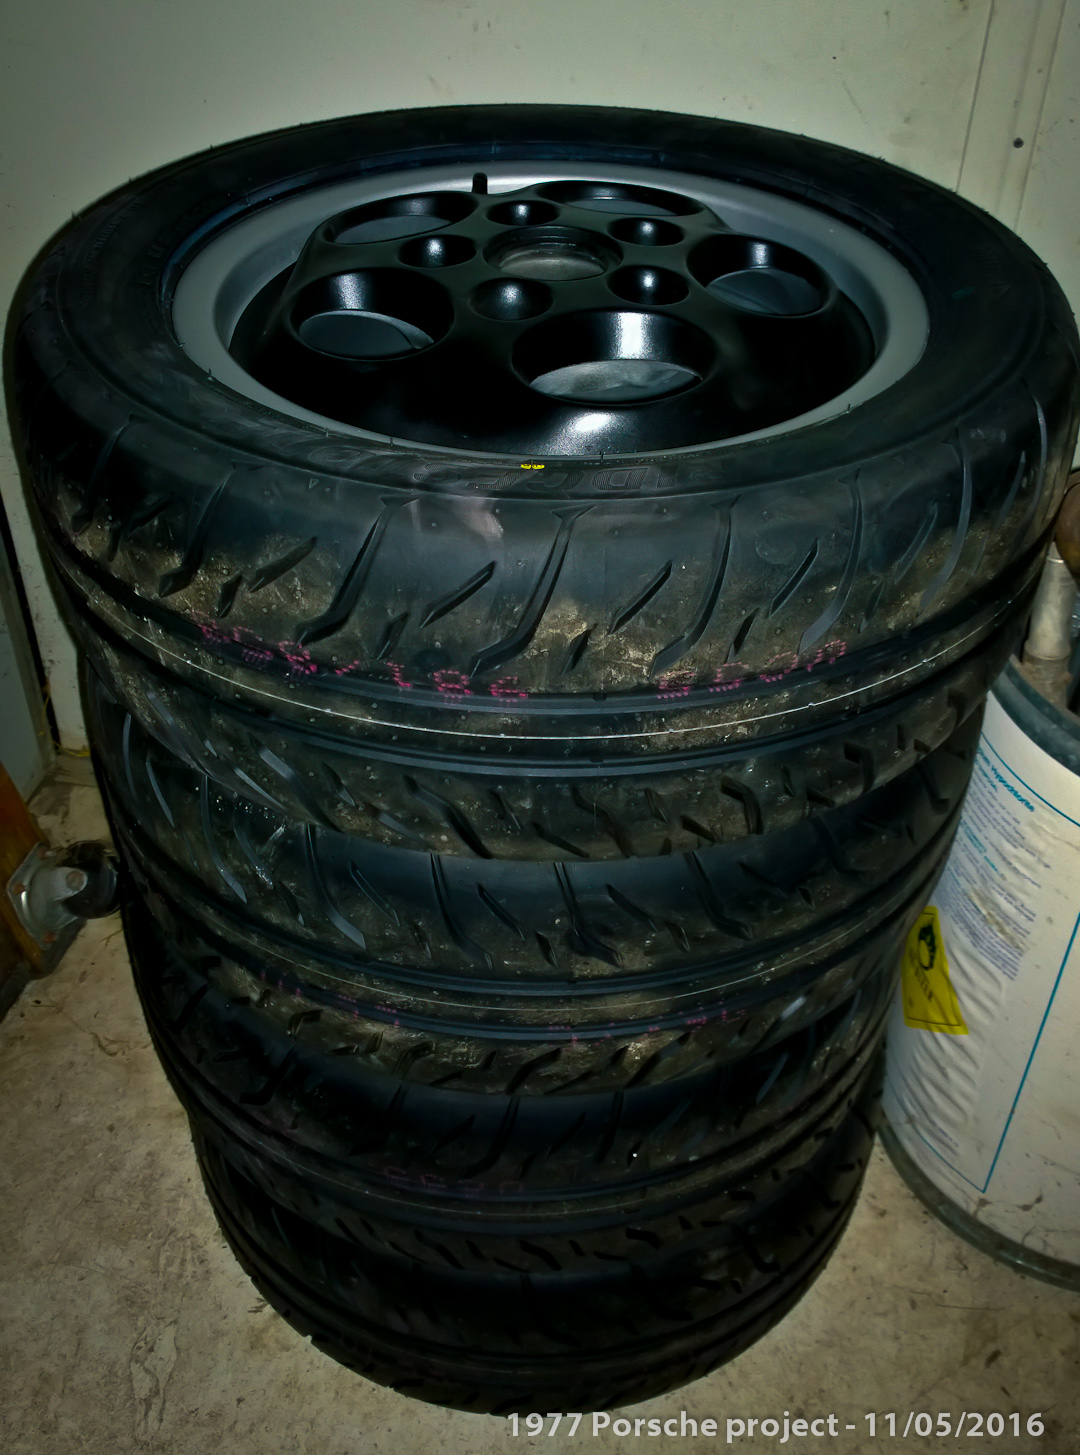
First on the workorder list, we knew it needed new tires, badly! The spare in the back was the orignal tire from the factory back in 1977. All of the tires on the ground were decades past their date codes. The rims were downright fugly, corroded, flaking and gnarly looking. So we removed the wheels, dragged them down to Discount Tire and had all the tires removed from the rims and ordered up some Falcon tires. Then we sandblasted, power washed and scrubbed the heck out of the aluminum wheels. We painted them with some hard shelled "wheel paint" a nice satin black and left the rims a nice silver color. Now they look like proper Porsche race car rims! While we were at it we painted the crumbling brake drums that I later just replaced - more on that later... We went back to Discount Tire and the red headed nightmare now has a full set of new shoes! I got bored and put some of my magnetic show stickers on it for a few photos of the new wheels...
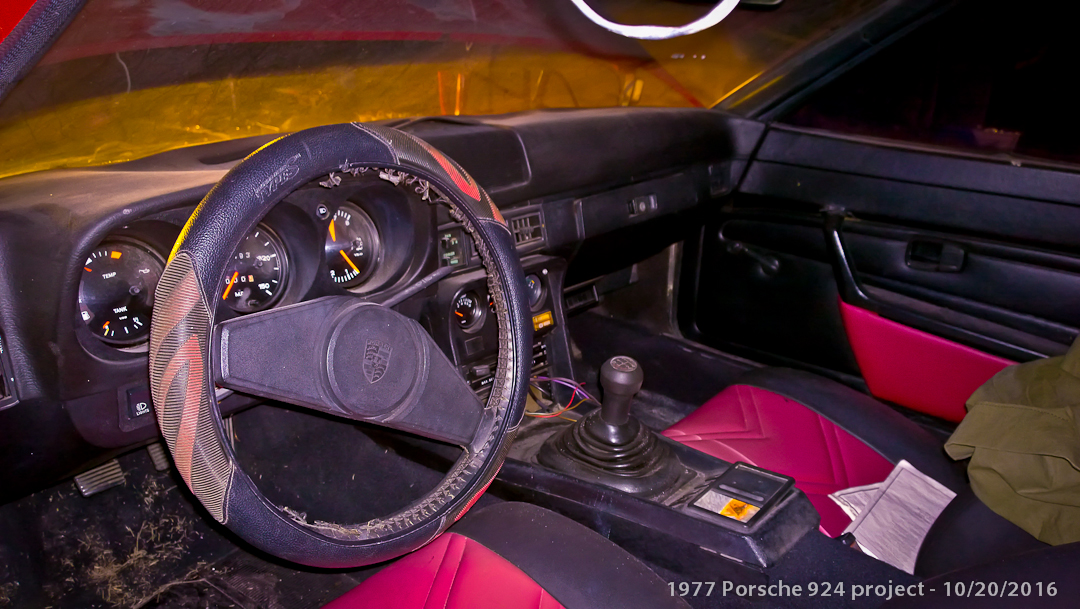
The interior needs some serious love but I am putting all that on the back burner until we get it running, moving under its own power and the exterior paint all sorted out... We have plans to install a complete 6 or 8 point roll cage so the entire interior has to come out for all that welding that needs to be done. And it will be a great opportunity to cover all that dead looking plastic with a carbon fiber film coating before we reinstall the complete and upgraded interior. We will probably add some guages too...
The engine bay project... Let's get it running again!
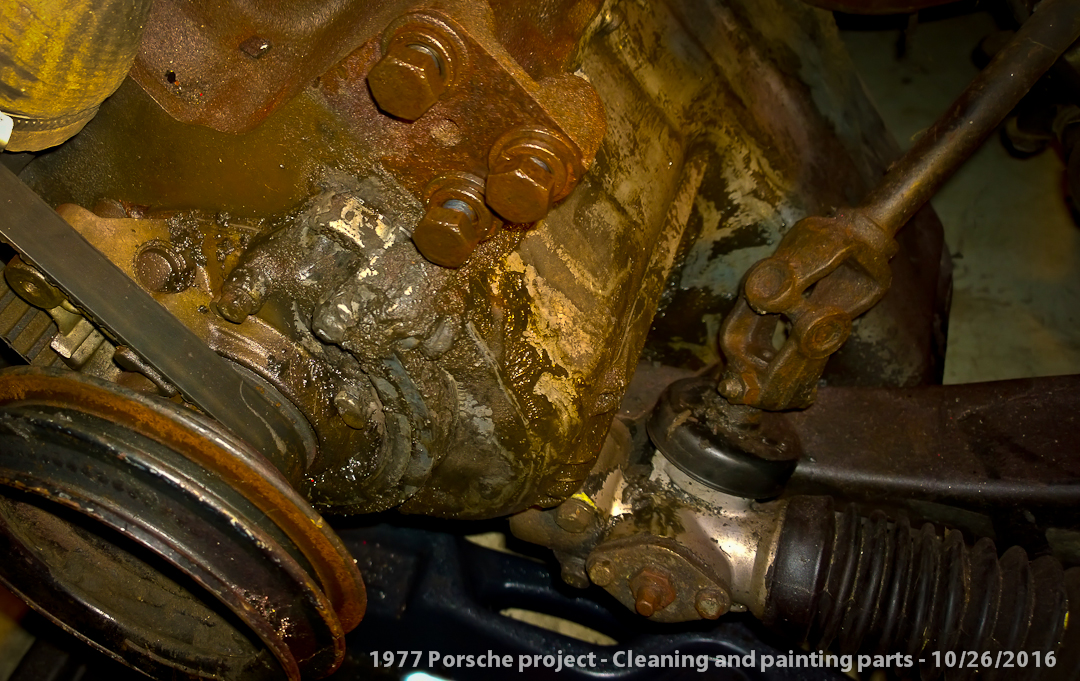
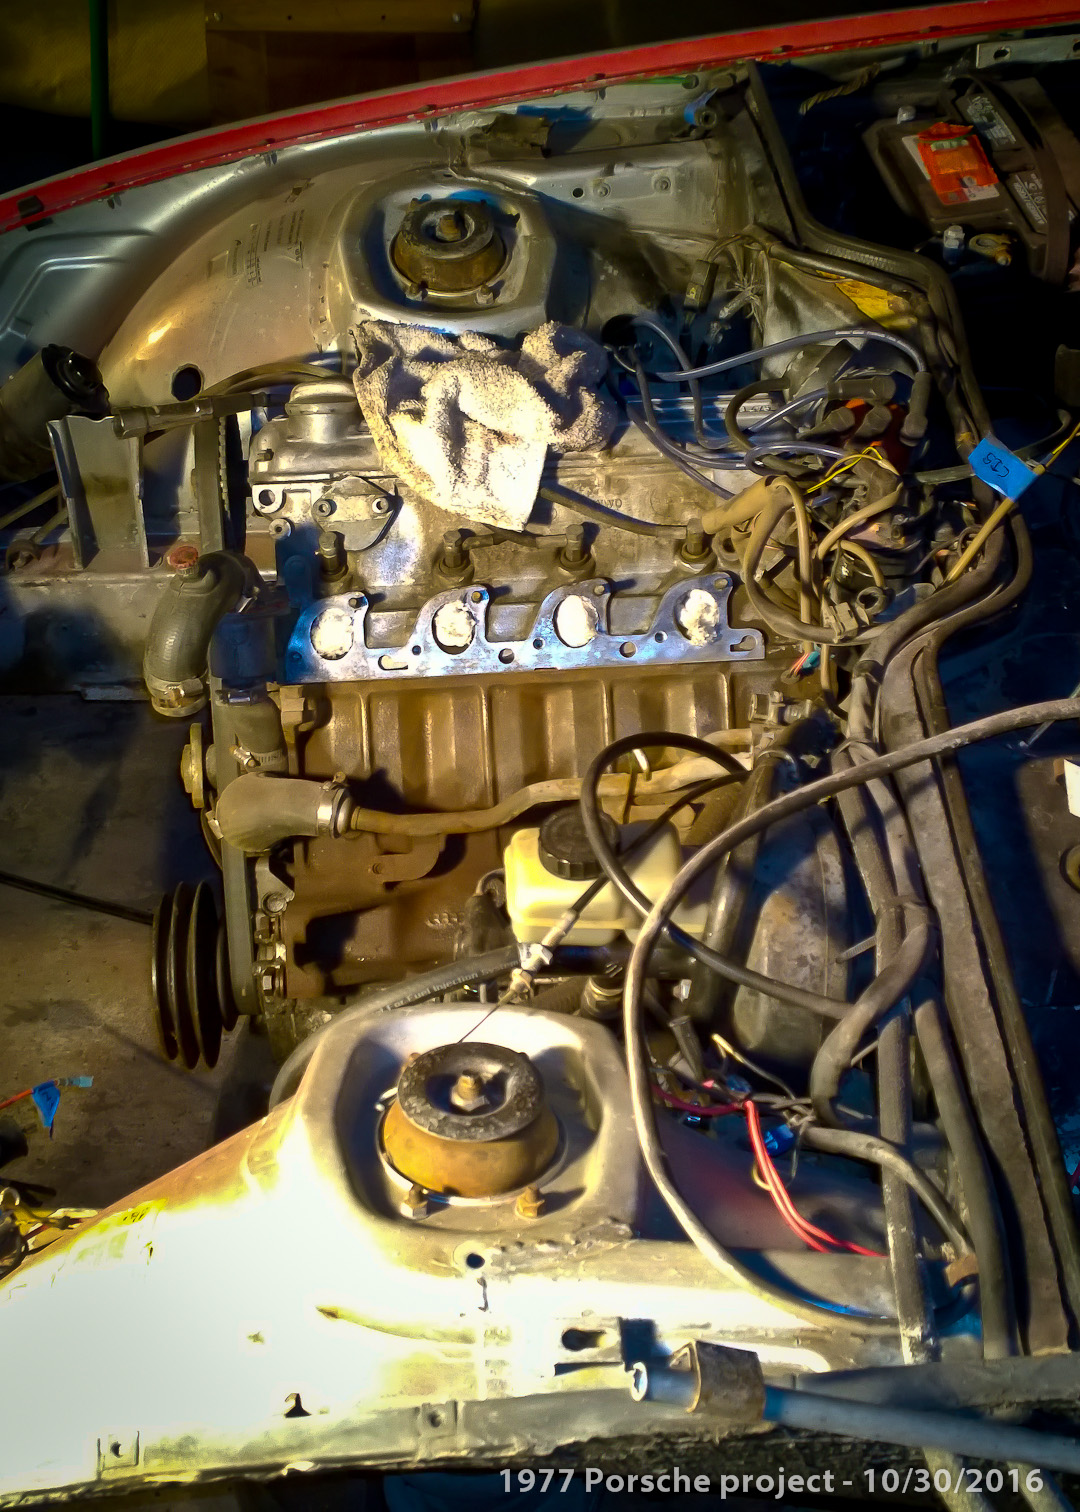
10/04/2016 - Once I turned my attention to the engine bay, we started trying to figure out what it would take to make it run again... It's been stationary for years. We found that someone snapped off a banjo bolt in the mechanical fuel injection distributor. I am an old farm boy, broken bolts don't scare me. I shot it with some rust eater spray, got out my heat gun and got that broken bolt up to about 400 degrees, grabbed ahold of it with a 50 year old set of vice grips and it came right out! We installed a brand new banjo bolt, put it back together, put some gas in the tank and gave it a shot...
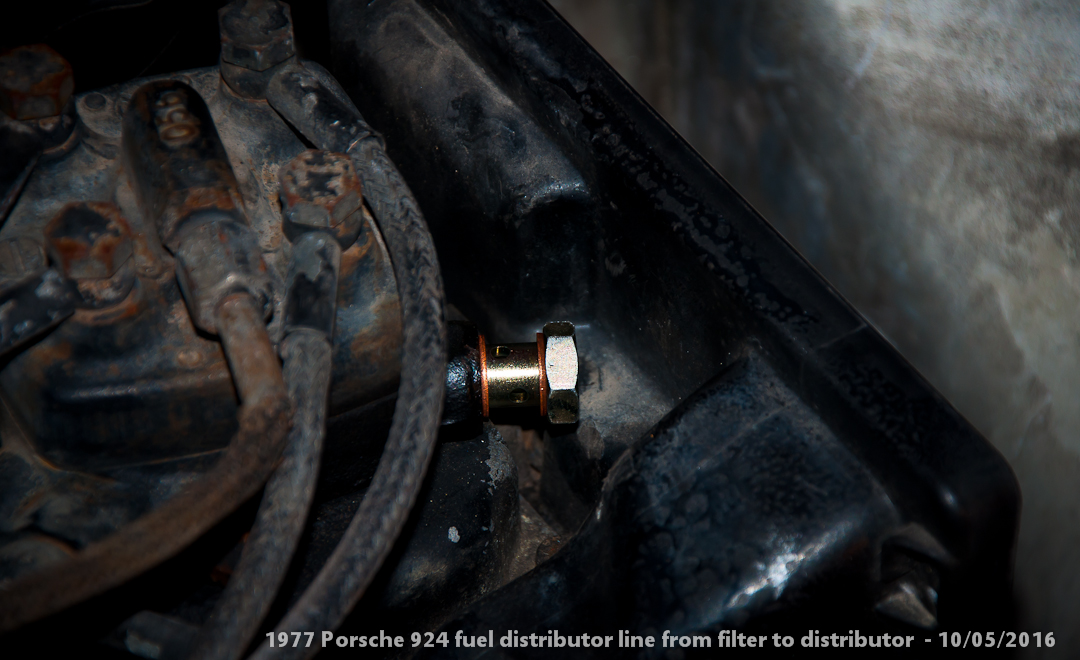
The photo above is of the new bolt in place... Unfortunately, this wasn't the only problem. When we turned the key on, you could hear the electric fuel pump growling away and then the HISSSSS started under the hood - my son yelled "TURN IT OFF DAD!!!" We had a broken fuel line spraying gasoline all over the engine bay! It broke off in my hand when I fiddled with it. The fuel line that was attached to this was a weird little animal with some rare double hose banjo fittings that nobody seems to make any more... And I do mean NObody...
But I found a ray of hope on the forums on the Internet! I found Greg "Downtown" Brown at Precision Motorwerks in Southern California who said he could fabricate me up a new line. He strung me along for two weeks saying he would get to it after finishing a big project. I gave up waiting for him as he wasn't very good at replying to my Emails. For someone who is looked upon as a Guru down in SoCal, I was disappointeed that after several Emails back and forth, (and several weeks of sitting on my hands) he could not deliver on his promises. So I went looking elsewhere - globally!
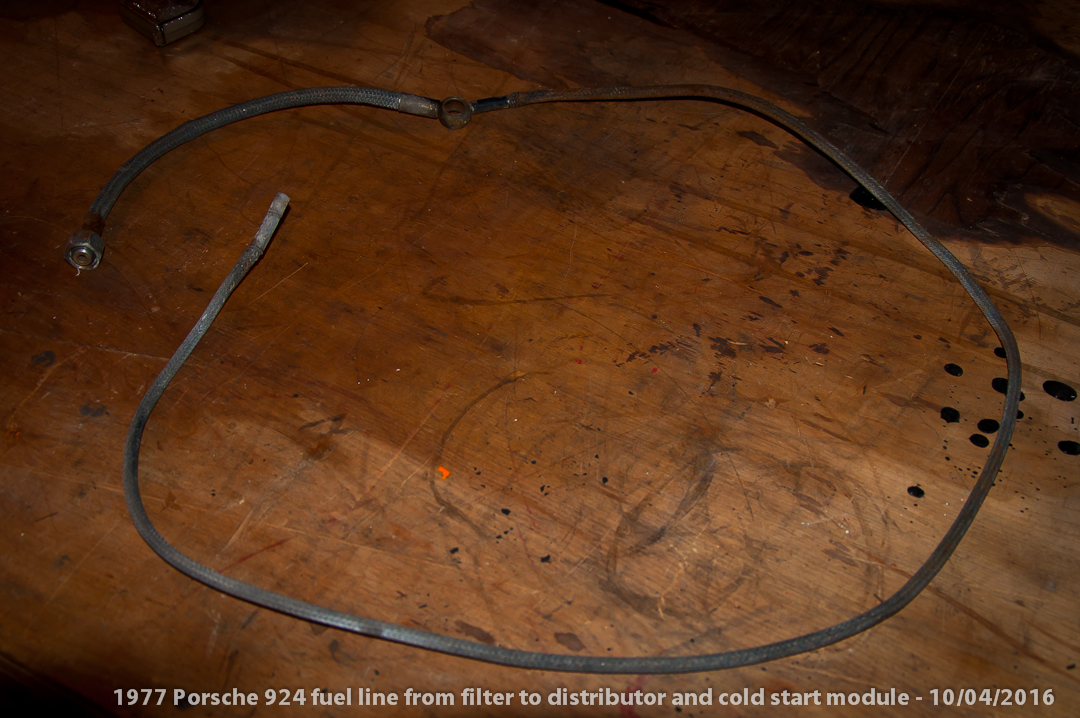
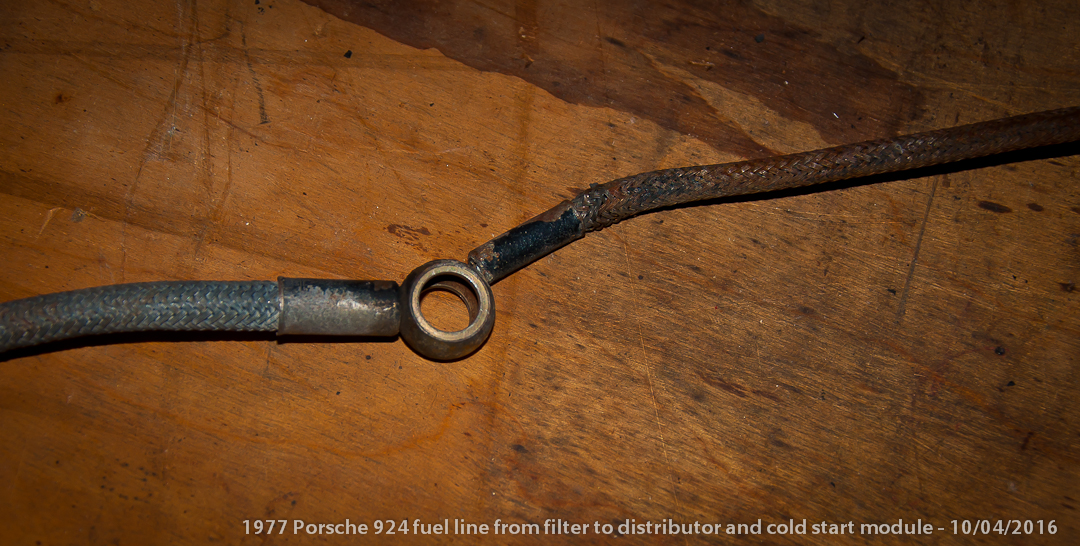
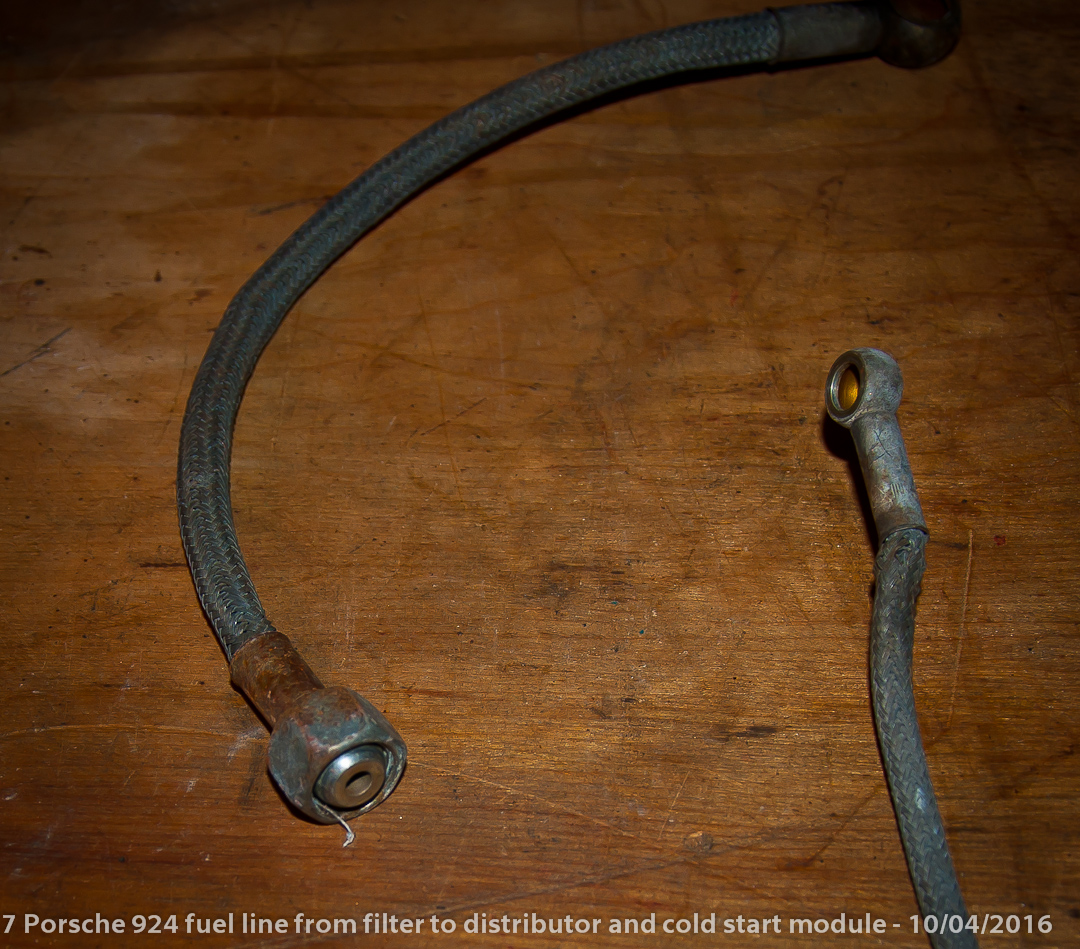
I looked everywhere. I talked to people in Germany, Australia, and even Latvia as well as a bunch of local places. Nobody could find me the part I needed - OR make me one! So in true Farm Boy fashion, I made my own out of some barbed banjo fittings, some 3/8" fuel hose and a little elbow grease. No more spraying fuel all over the place! We tried starting it up again, only to discover that the mechanical fuel injection system called "CIS" by Porsche wasn't passing fuel to the injectors, at all! The CIS was dead in the water and needed to be removed... Now I was glad I didn't spend a bunch of money to find the "right" fuel line! But I was also faced with the fact that any way I went from here was going to be about a two grand hickey I didn't really want to pay.
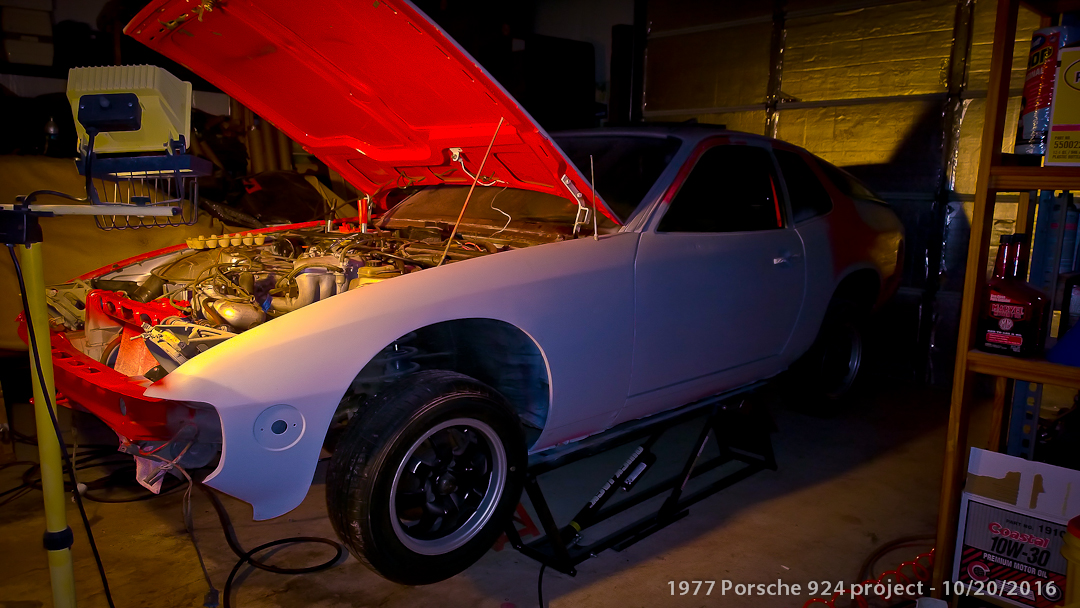
10/20/2016 - A bit of GOOD news! Upon trying to get it started, the engine DID start right up on ether! So I have hope that the engine isn't too far gone! It RAN for all of 10-15 seconds... even with no fuel coming into it from the CIS. It tried! It wanted to run, it just needed a new fuel delivery system. Unfortunately, I am going to have to convert it over to something else.
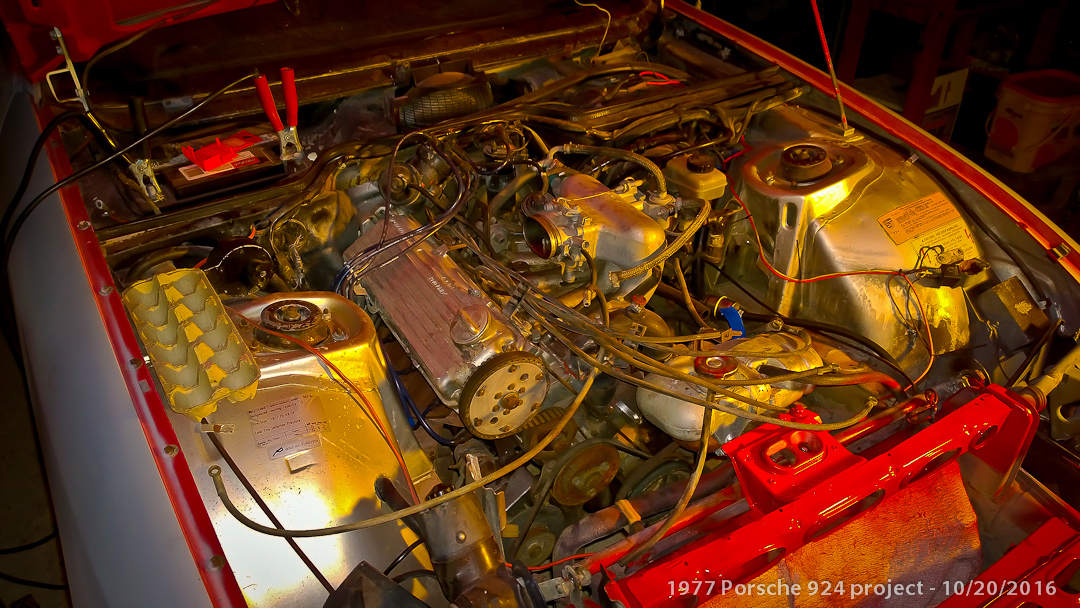
So I gave up on the ancient mechanical CIS. Besides, it is famous for being unreliable and it takes up WAY too much real estate under the hood. I started ripping it all out by the roots. I needed either a carb conversion kit or just bite the bullet and go with an all electronic EFI conversion. Although the EFI was the obvious modern way to go because you can tune it with a laptop, the conversion required gathering a bunch of mis-matched parts I didn't know where or how to source. I wanted something simple! I needed a KIT!
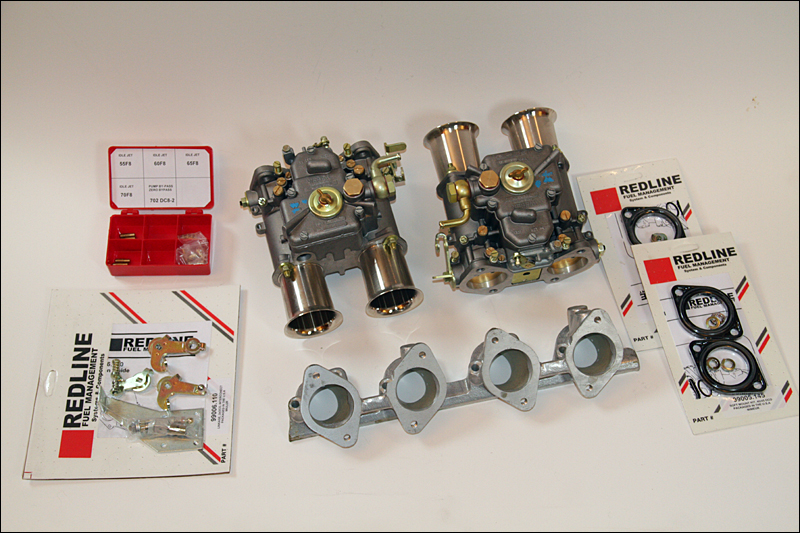
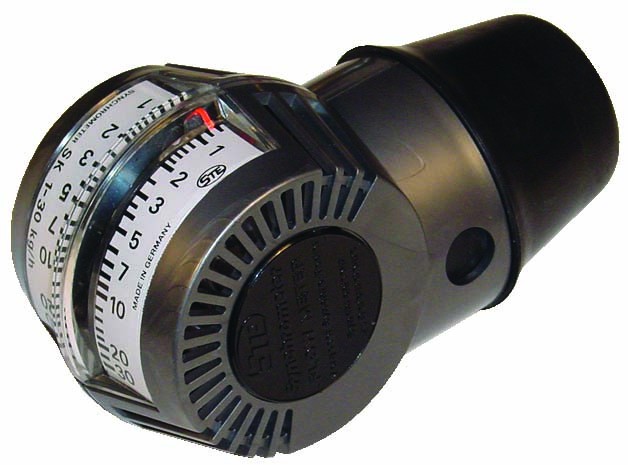
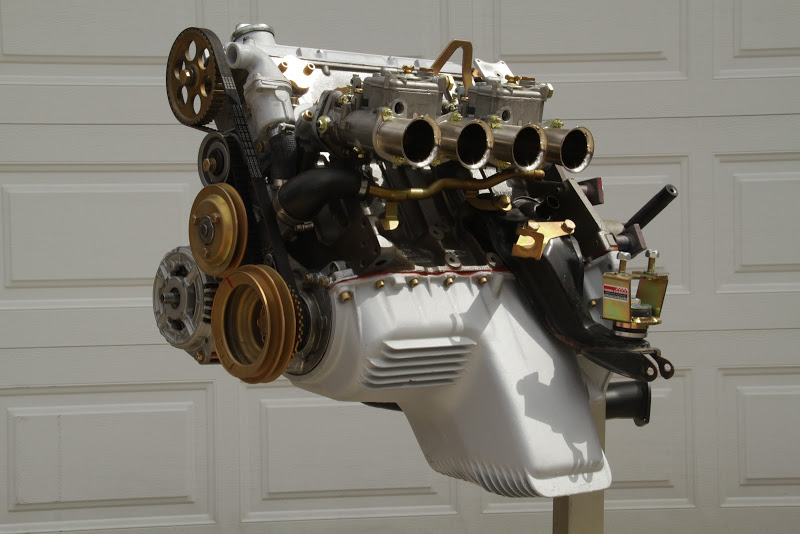
The carbs were cheaper, simpler and lots of people had already done this so there was plenty of info out there on the web to make the transition easier... Not to mention, four little tubes sticking out of the side of the motor just somehow looked sexy. So I ordered a complete Weber Redline carb kit from Ideolas Garage from their website. While I was at it, I got a synchrometer, new low pressure/high volume fuel pump, in-line pressure regulator and a Weber tuning guide from him as well. It's a complete kit that even comes with the right throttle cable brackets! Dan Beckett was very helpful in my initial Emails with him before the sale.
The Body project...
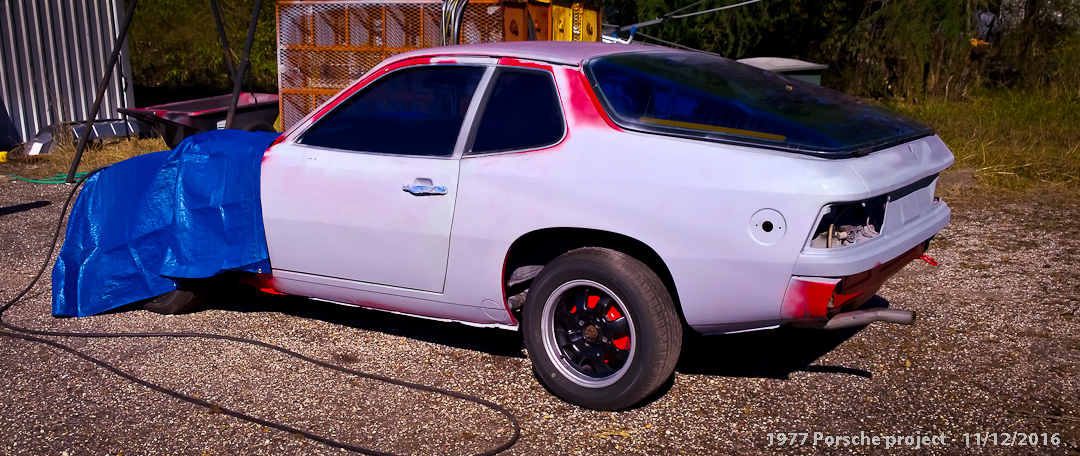
While I impatiently awaited the UPS guys arrival with the carb kit, I turned my attention to the sad, spider cracking paint job... And boy was it a mess... Not everything was bad and Porsche did a GREAT job of rust proofing this car, It was sort of "galvanized" at the factory and the coating did its job quite well! So I didn't want to take it down to bare metal if I didn't have to. But we sure sanded a lot to get through what seemed like 7 layers of mystery paint! The "middle" layers of paint seemed to be the ones that were "contracting" and shriveling up, thus causing the cracking. The layers close to the metal were fine. It took some diligence to keep from sanding right into the galvanizing job that Porsche did at the factory. Patience is not my strong suit.
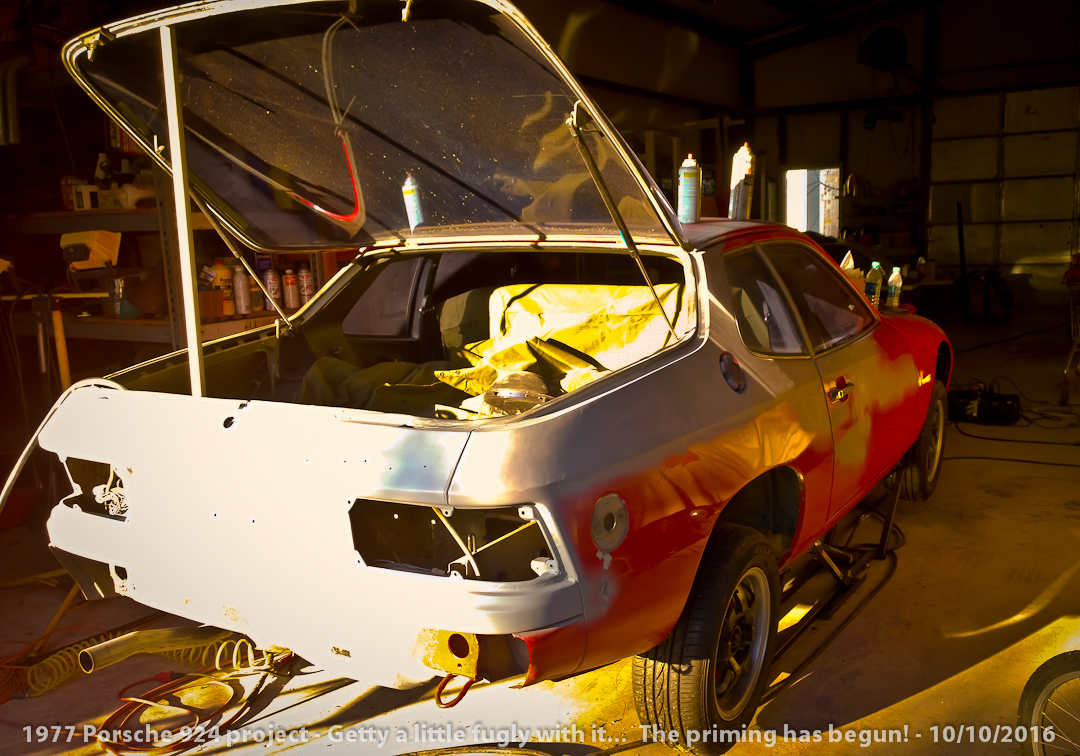
After a couple of weeks of sanding, filling, bondo-ing, sanding and sanding some more we discovered this car had been painted before, multiple times... It had endured a couple of accidents. Some minor, some not so minor. The car was white from the factory and had its color changed since then. The lower front valance looked like someone made a hobby out of running over parking dividers. We got an education in how to use a hammer and dolly set, a bunch of air powered sanders and a lot of bondo to take out some dings in a few spots. Luckily, there was only ONE spot of rust that was really bad, on the driver side front fender, in the back on the bottom - where dirt collects behind the wheel and soaks up moisture. Once upon a time, someone just bondoed over it. We removed all the old bondo, ripped out the rust (and a lot of metal flakes!) and painted it with a stabilizer. Then went back and slapped some more bondo on the spot and sanded the spot so it looked like it was never there... This is a race car, not a family heirloom or show car... A little bondo is OK!
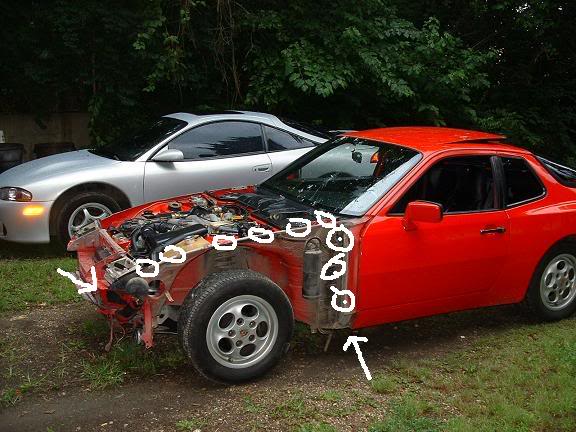

I had all sorts of fun trying to figure out where all the damn bolts were that held on the driver side fender. Luckily I found a photo on the web that someone had taken the time and marked them all. Once I saw this, it was easy - sort of. The carbon cannister was reinstalled with some oddball hardware by a body shop (Many moons ago!) that made it a real bitch to remove! The antenna had to be removed. Once all this was taken care of, it came right off with little fuss. And then I found the real extent of the rust damage... And set to fixing it all!
And I find it funny, the more we worked on parts, the more little flaws we found... Now we both know why GOOD body shop guys get paid so much! I spent three whole days just on the roof alone!
While the fender was off, we took the opportunity to take a wire brush to everything under the fender and removed a lot of chipped paint, crumbling undercoating and layers and layers of crud. We shot the under side of the fender and the entire fender well with spray-on bed liner material. I went ahead and painted the underside of the nose and the door pillar with an industrial coating that very closely matched the original Porsche red. Nobody will ever see these spots so it is a good opportunity to see how the paint will look on the rest of the car - someplace hidden, where I can cover up a mistake! The coating came out nice and shiny and this stuff is as tough as nails as it is meant to be used on tractors and you end up with a shiny epoxy like coating that wears like an anvil. The whole car will end up with this slick coating before the "car wrap" goes on...
After a couple of days work, the fender was undercoated, bondoed, primed and ready for reinstallation. Every little ripple, dent and chip had been filled, sanded and prepped for the final coats of paint. I have to hand it to the Porsche engineers, taking this fender off was pretty easy compared to some American designed cars I have worked on over my lifetime...
Looking at the brakes while paint was drying, it was evident that they needed to be completely rebuilt - totally! But I wanted a full disc brake setup. Something that just wasn't available back in 1977. I needed a donor car...
The Donor aquisition...
10/20/2016 - I needed to find a 1980's car to part out and dog rob a complete suspension setup, new 5 lug spindles and a complete set of "sport" brakes and associated hardware. So back to the web I went, and came up empty handed. But, lucky for me, after asking around, a local car repair shop had one in their storage lot. The previous owner couldn't afford the transmission work that needed to be done, then went over to Afghanastan and hasn't come back since about 2009 leaving this old car under a tree ever since. His loss was my gain! I got the non-moving heap of bolts for $500 bucks... ANOTHER $500 car... LOL
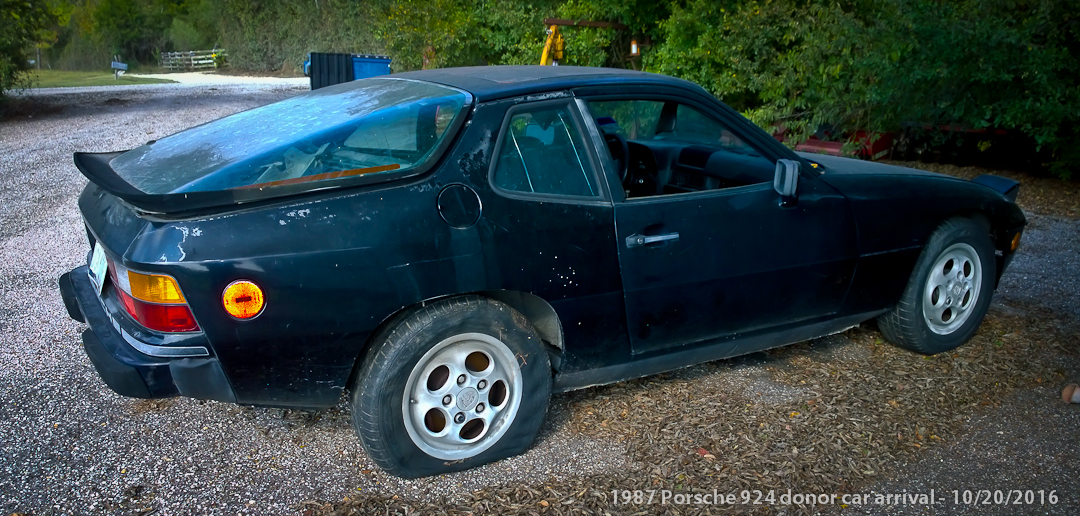

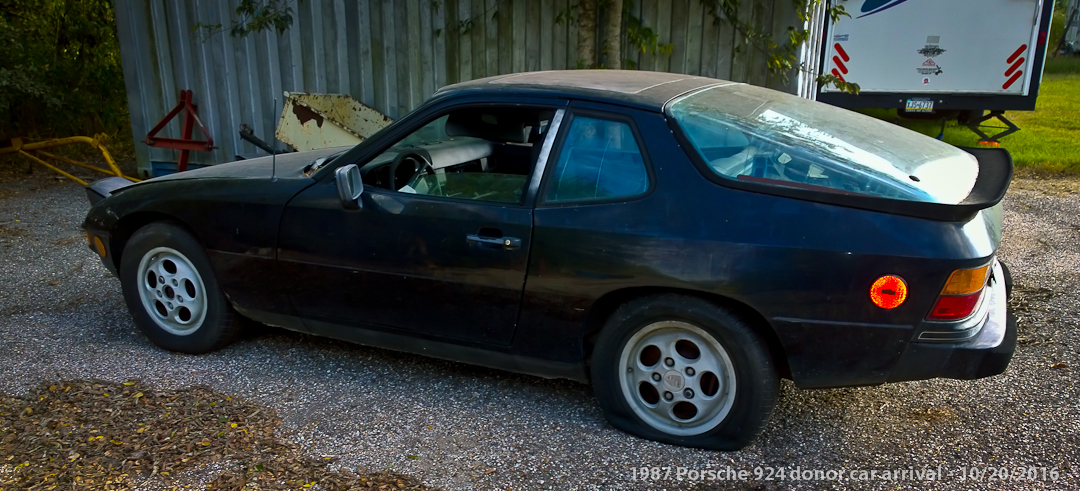
I needed a lot of little parts. Lots of original hardware and stuff. Little stuff that isn't made anymore and hasn't been available for more than 20 years... I found a basket case of a 1987 924s (Sport Model) with the busted automatic transmission literally sitting in the back hatch. It hadn't been parted out yet, was relatively complete, but far beyond my ability to fix it. Perfect for what "I" needed!
I had to wonder though.... Who the hell would want an AUTOMATIC transmission on a Porsche?!? That almost seems like blasphemy to me...
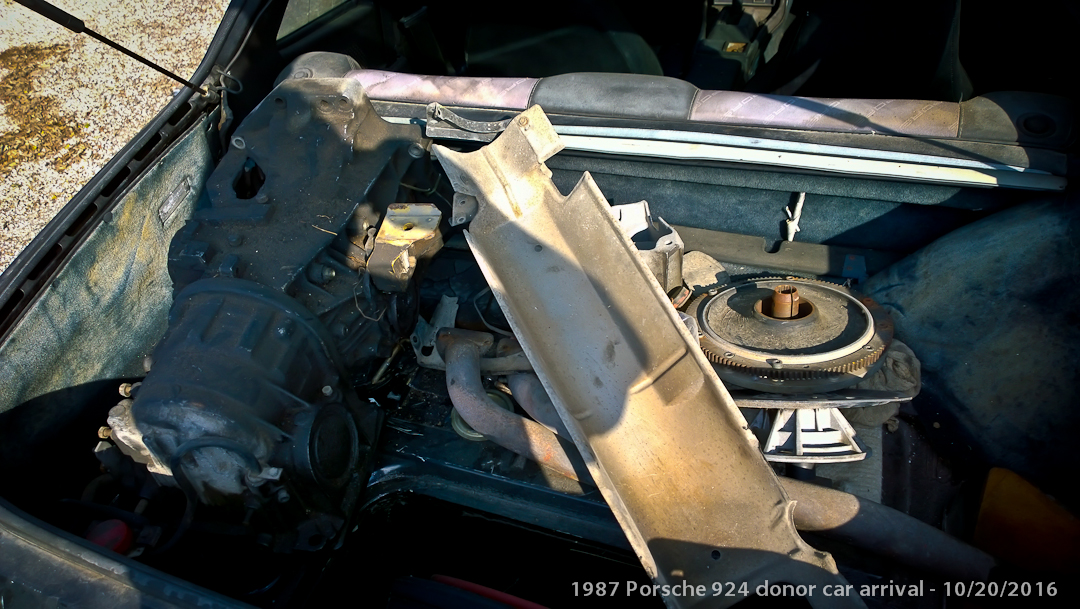
The car came with a back hatch in good condition, complete with rubber "wing", interior parts, seats and other bits would bolt right on to my old Porsche in the barn... Some parts, like the engine and transmission were useless to me as they were from the 1980's and not the 1970's. Porsche did a complete re-design of the car for the 1980's after a falling out with Audi/VW, leaving me with a bunch of stuff I had no use for... But also a lot of stuff I could use! The best part - a lot of hardware that was missing on my red Porsche, after the collision repair folks worked on it (way back when) that didn't know how to work on Porsches is all on the 924s! They actually went back with SAE bolts in places and put rivets in multiple places instead of the Porsche screws. I had a lot of little detail hardware, plastic bits and pieces to replace on my baby in the barn and it looks like almost everything I need is all on the donor car! YAY!
Now that I have a donor car for the suspension, spindles and hubs and the brakes - all those fix-er-upper parts I already bought for the old stuff is sitting here in boxes staring me in the face. A big pile of parts I can't use on the new car. Because I just changed everything over to updated parts with the new donor car... Even the sharp looking four lug rims we took so much time and care restoring - we can't use them on the 5 lug spindles and the new all wheel disc brake setup that will all end up being on the 1977 car. The new tires wont even fit on the new five lug rims from the donor car! Oh well, I can sell them on eBay! Which is where a lot of these fixer-upper parts came from in the first place...
Now we own two Porsches... The parking lot is getting too full of non-running $500 cars...
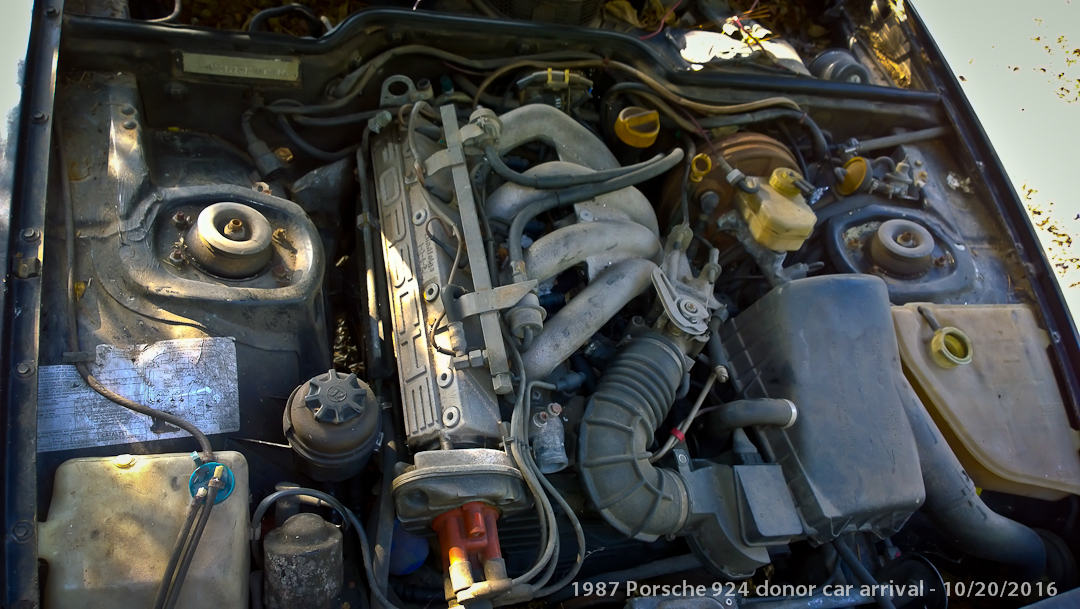
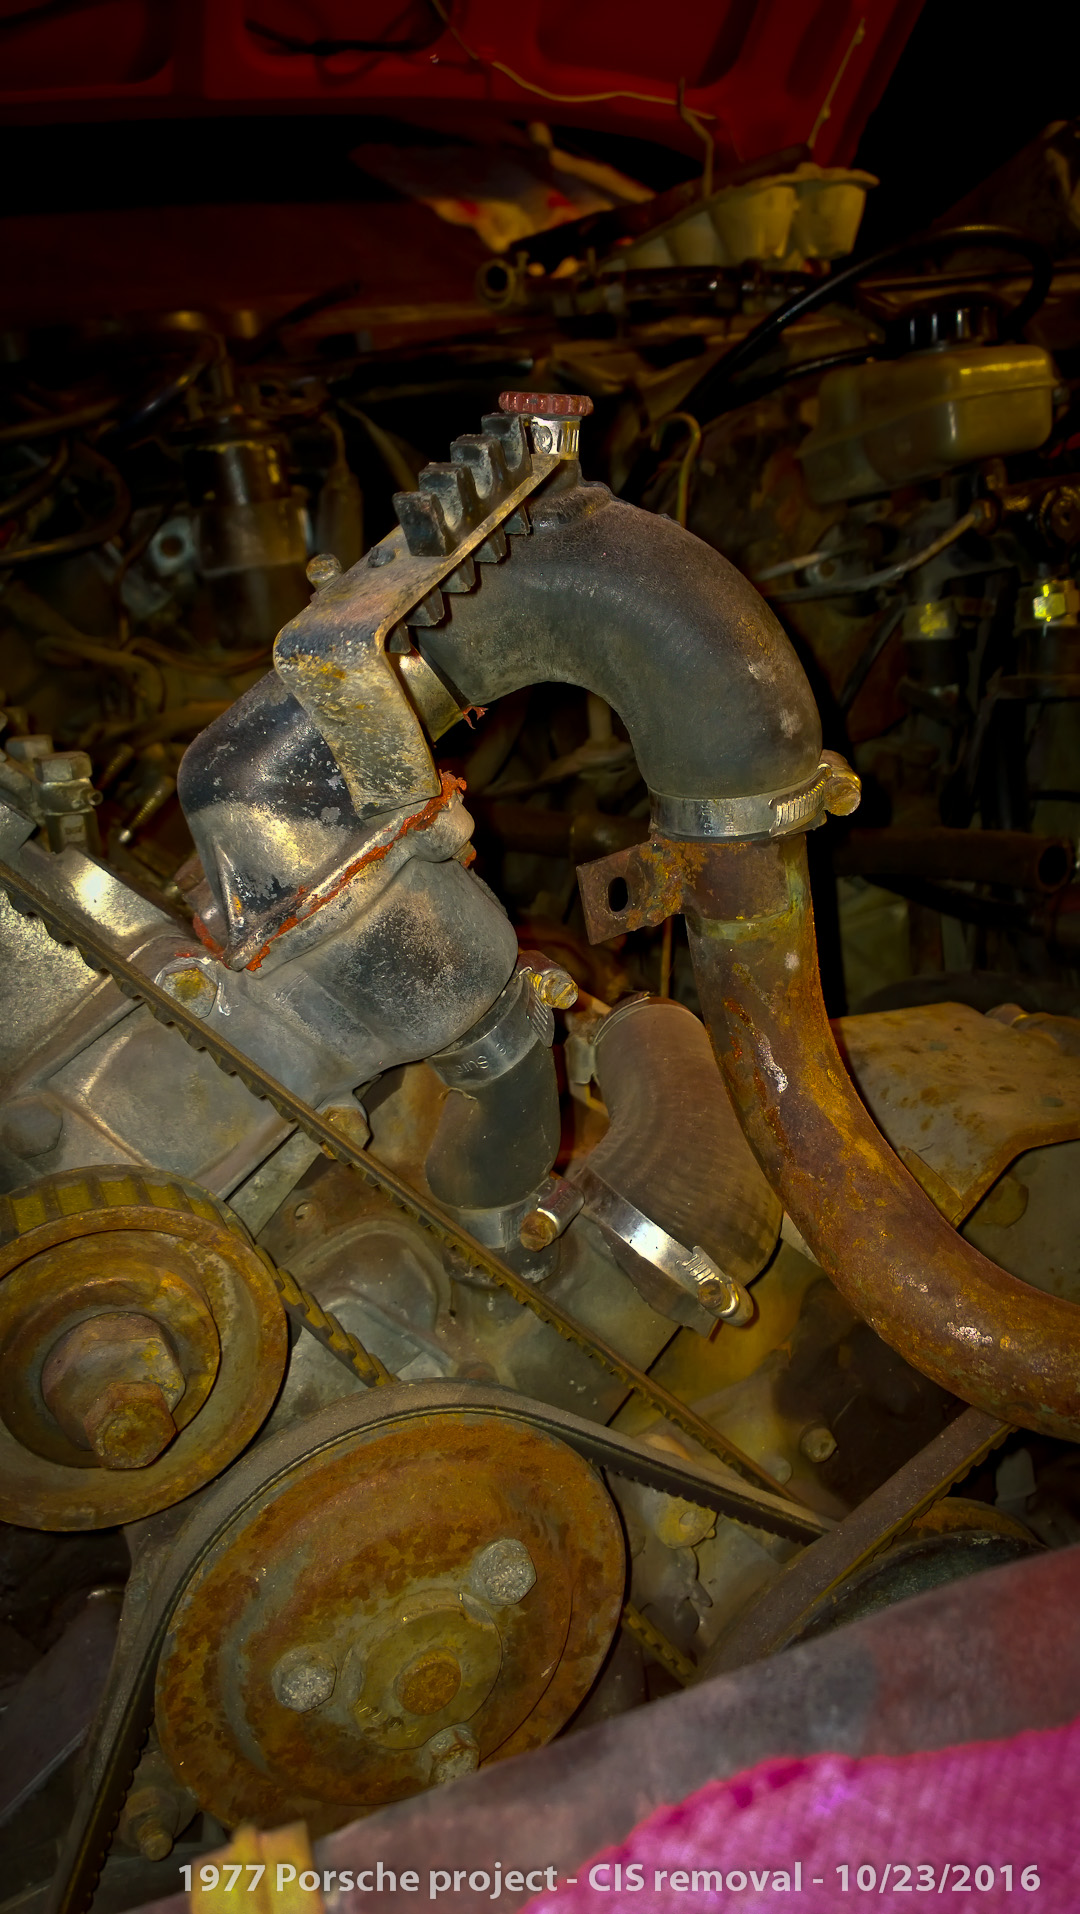
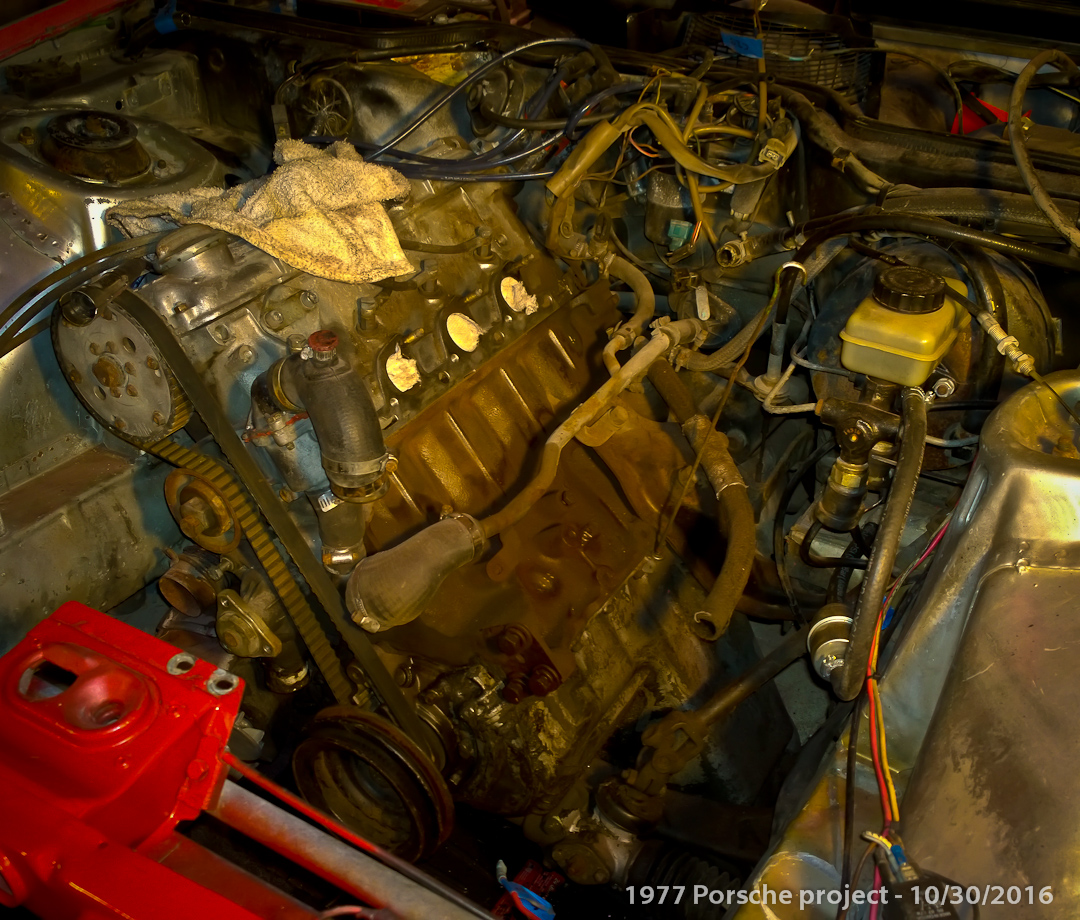
10/23/2016 - We went about removing the entire CIS today. I was impressed that every single bolt and nut came out without a fuss! The CIS came out first. The cooling system overflow tank parts got in the way and aren't going back in so they were removed. Then the big heavy aluminum intake manifold and throttle body came out last.
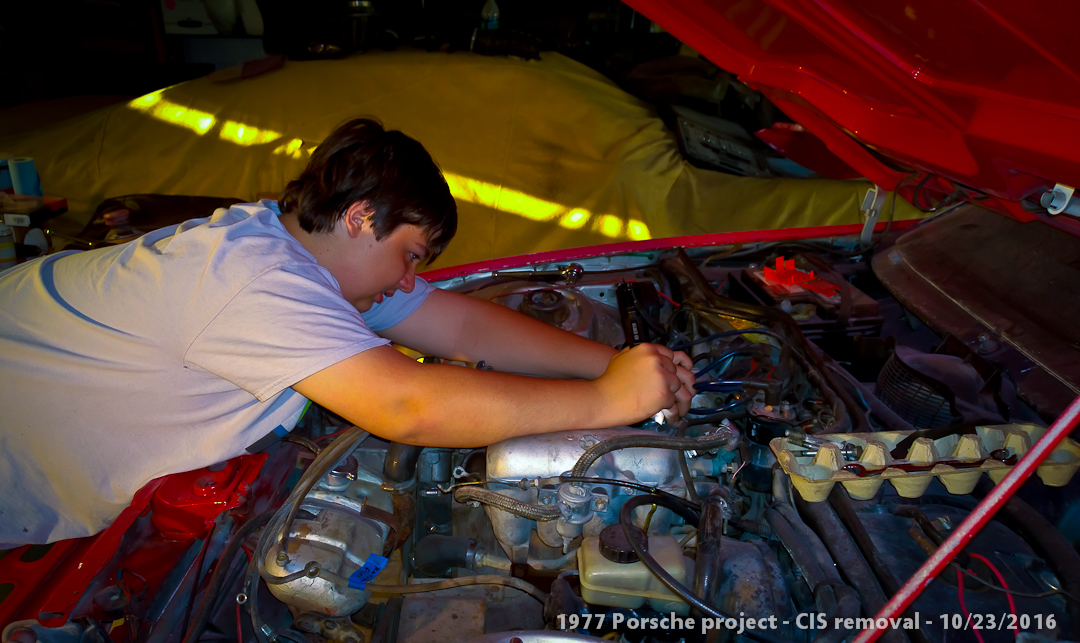
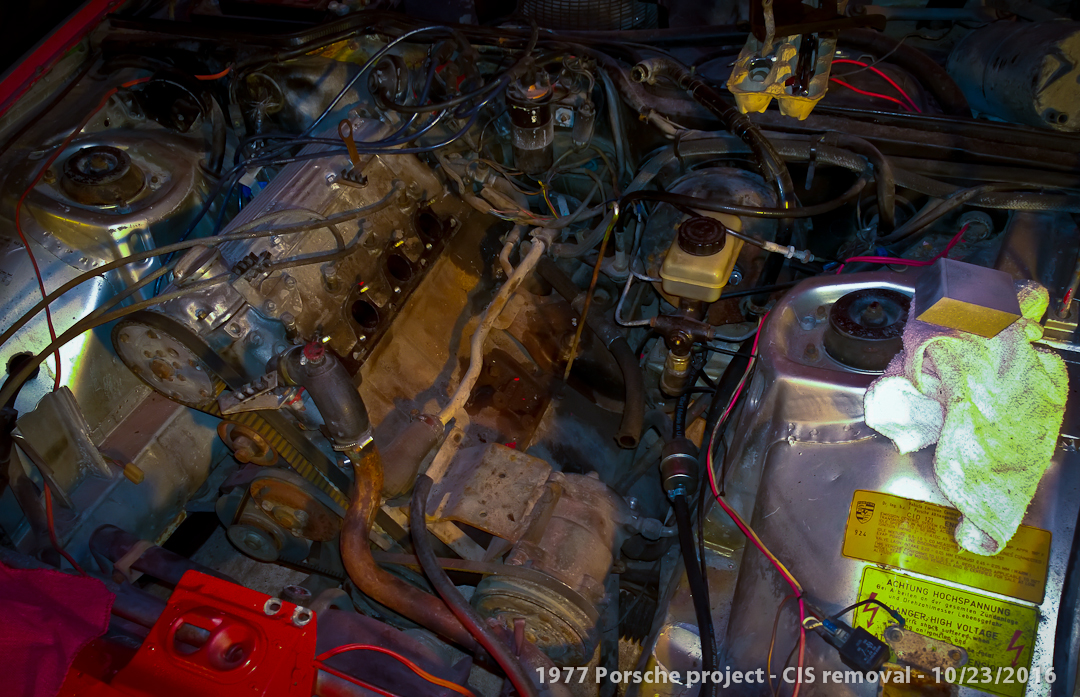
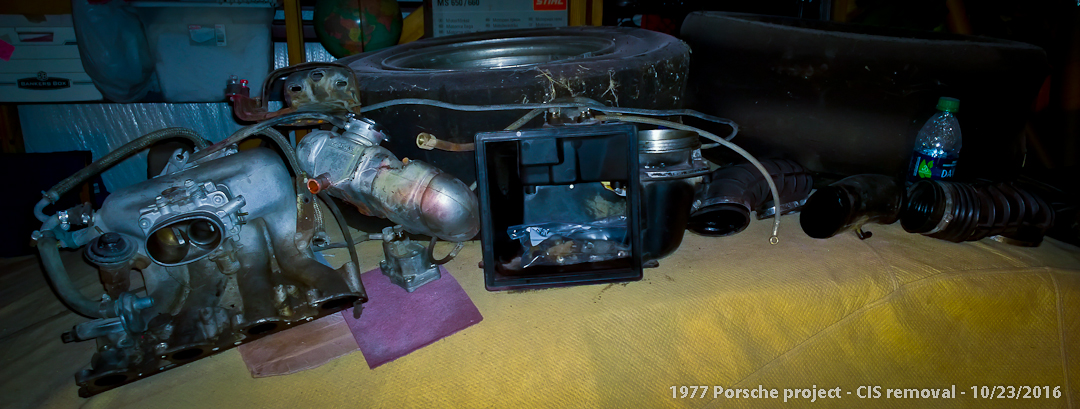
Thomas helped me get it out because it required a lot of bending over. His back is in better shape than mine! After the removal, as you can see in the middle photo, we left a cavernous space behind! The photo on the right is the complete CIS system sitting on top of another car waiting to be boxed up and set aside for sale on eBay, somebody out there might have a need for these parts!
The A/C system is about half disassembled and almost ready for removal. The cooling system is partially dismantled and almost ready for removal. While I was at it, I removed the return fuel line so I can go find a metric barbed fitting for the new fuel system plumbing. The radiator will be taken to a local shop and see how much crud we can boil out of it and have it checked out and pressure tested. The A/C system will be tossed in a box, probably to be sold on eBay. It was hose clamped together by a body shop repair many moons ago and hasn't worked in decades. We could stand to lose the weight!
10/24/2016 - The radiator got removed and then dropped off at Don Harts Radiator shop in Waller, Tx. These guys have literally been around almost 100 years! They have done work for me before on an almost 40 year old old John Deere tractor that nobody could furnish me with a replacement for. They are masters at re-working what you have to make something workable. And they did a great job! On the John Deere they gave me 25% more cooling capacity with more cores in the new radiator. It worked like a charm... With this radiator, they will be cleaning it out and pressure testing it for me since it has been sitting so long I didn't want to trust it for the race track without someone checking it out first. I have my fingers crossed that they find no issues with it. It should be back in my hands in a few days.
The metric fuel line to 3/8" hose barb adapter for the fuel return line back to the tank has been ordered and is on its way - Thanks eBay! By the time the carb kit shows up, we should be able to plumb it right in! I went to every single auto parts store and hardware store in town, nobody had it. I even drove to stores in surrounding towns, still no luck! A quick search on eBay and I had it ordered in less than ten minutes... I find that to be rather sad... Every store gave me the same story - "Corporate pulled all of our "Dorman Drawers" of small parts and hardware because they didn't sell all that well and they needed tighter inventory control..." I understand inventory control, I really do. But without those hardware drawers in the back for weird little parts that I rarely need, but when I need them, I NEED THEM - they become downright useless to me. Which makes them lose my business to the Internet and makes THEM lose my money AND my business! I mean, why drive to town, stand in line for 20 minutes waiting for someone to help me just to be disappointed by them not having in stock what they used to have in stock for the past 40 years and they can't even order it from a warehouse somewhere? When I can search, click and then wait for the UPS man all by myself and without their help... And they wonder why they are losing business and sales are down...
Which is the same reason why I never even bother trying to go into Radio Shack anymore, they never have the parts I need for my projects - and they used to ALWAYS have the little parts I needed for my electronic and ham radio projects... I you don't have what I need when I need it, (and you HAVE had what I needed over the last 40 years!) you lose the rest of my business forever, period, end of story... And they wonder why their business is plummeting, they are being forced to close stores and are now facing bankruptcy... They simply no longer do what they have been famous for doing, for decades...
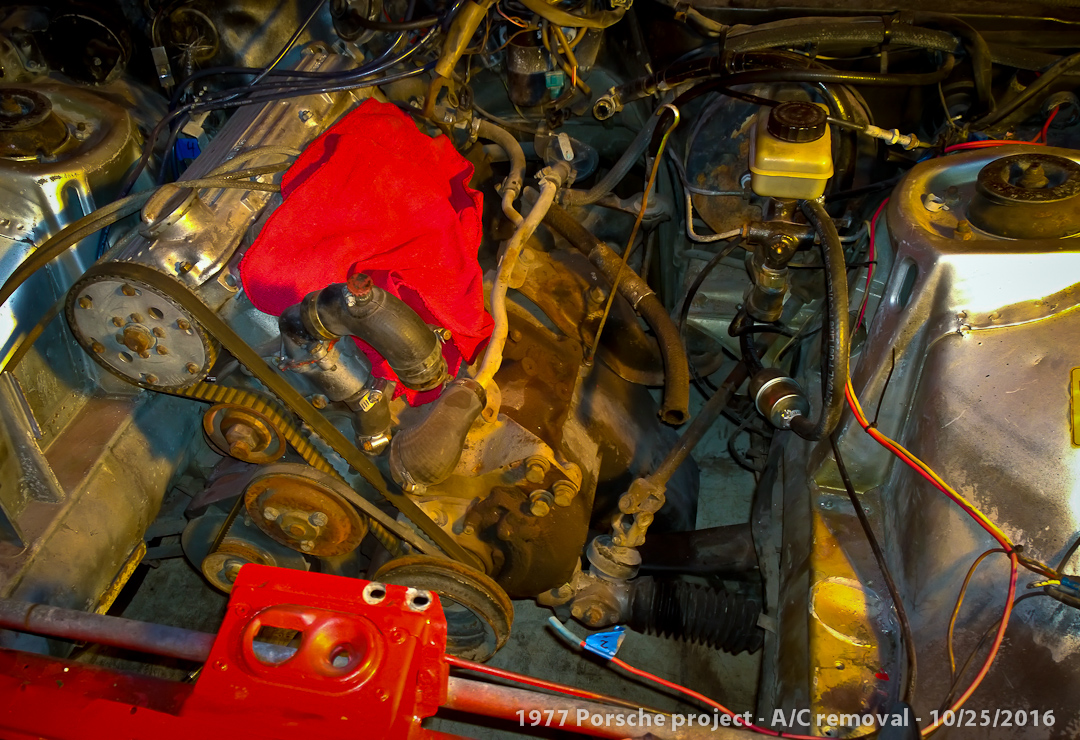
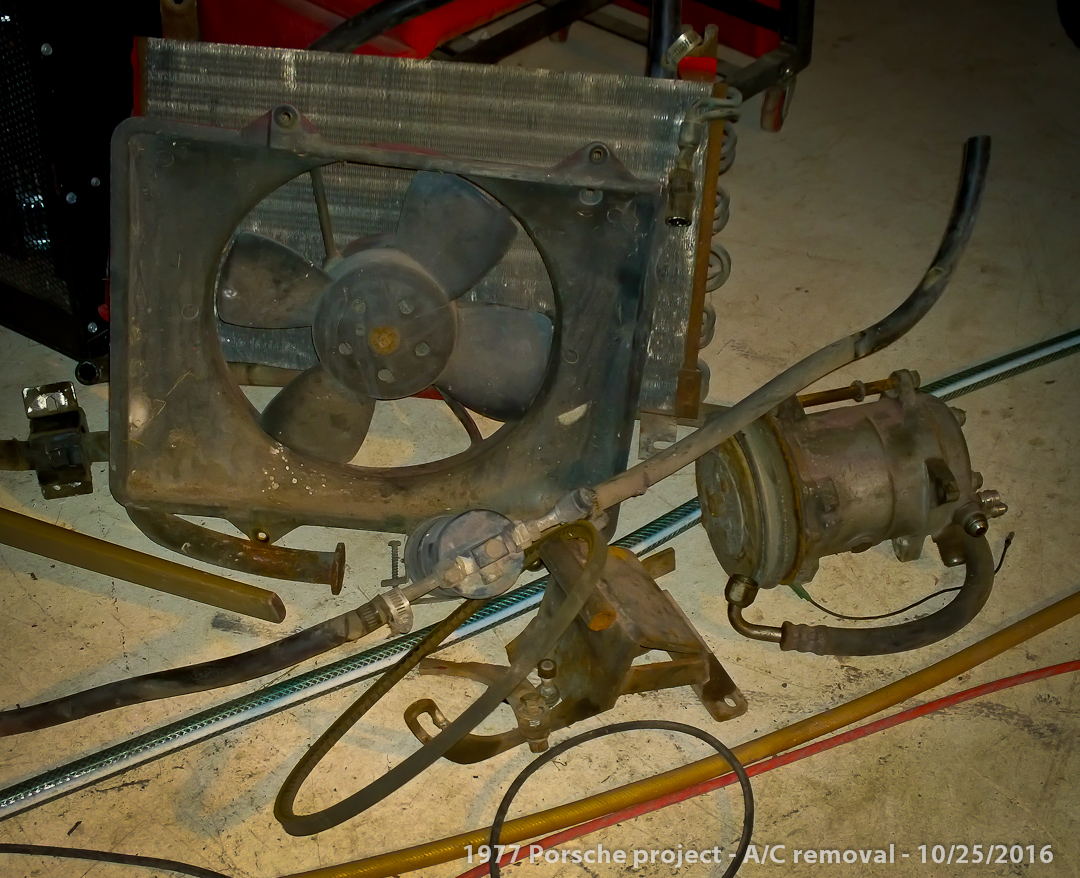
10/25/2016 - I finished removing the A/C compressor, lines, dryer and the condenser coil - and good lord that thing is heavy! Soon to be tossed in a box for eBay. Thus removing a lot of weight from the front end and clearing out a lot of space under the hood. Besides, race cars don't need A/C! I also went ahead and ordered all the needed replacement coolant system hoses from Paragon-products.com. Upon inspection, it looks like all the coolant line hoses are all in pretty decent shape, but since we are reworking this for the track, I am not taking any chances! If it is rubber, it's getting replaced! I have found way too many instances of original, from the factory, rubber parts on this car (that have never been changed since 1977!) that are just crumbling in your hands when you grab them and tug - not to replace all the rubber where I can find it would be foolish...
The old single fan unit will be replaced with a double fan unit off of the 1987 Porsche 924s donor car. The pulleys and alternator bracket all need a good shot of sand in the sandblasting cabinet and some high temp paint. I would love to paint the engine, but I am more worried about getting it running at this point. If we run into problems and need to pull the engine, THEN we will clean it all up, paint it and make it pretty... And at that time, we will paint the engine bay silver too! Silver was chosen so bolts and fasteners don't disappear into an all black cavern of an engine bay when we work on it in the future. Yeah, we have some experience with losing things in an all black engine bay on race cars at the track, in the pits, at night, in the dark, in the past! It's no fun!

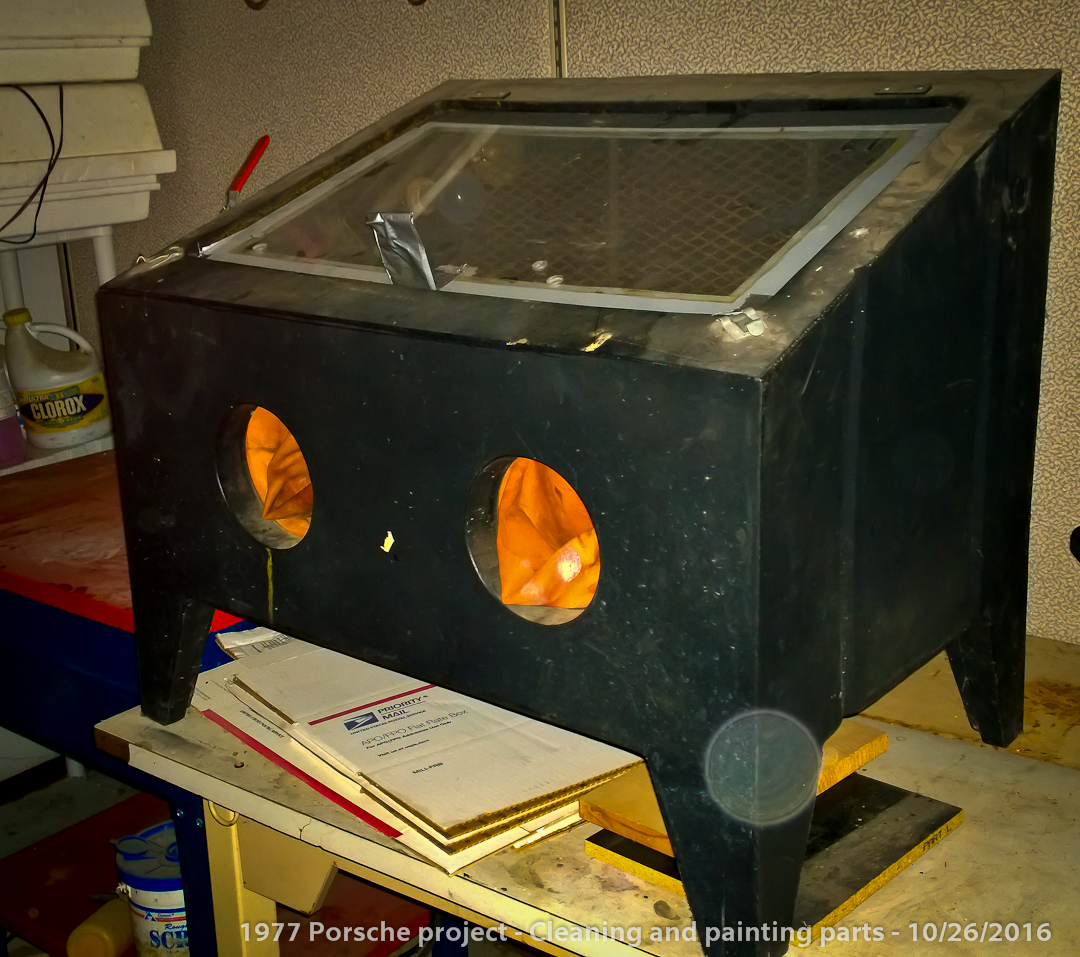
10/26/2016 - Still sitting on my hands waiting to hear when I will be receiving a pile of engine parts... In the meantime I removed some pulleys and brackets and cleaned them up and put some paint on them. Thank God for my little sand blasting cabinet, it makes life easier! Not to mention my parts washer filled with mineral spirits from Harbor Freight! It made refurbishing these parts a breeze. The engine is a greasy mess. A half a can of engine degreaser and a fun bit of scraping with an old paint scraper knocked a dent in it all, but only that, a dent... I want to take a power washer to it so bad! The more I clean, the more I want to totally clean it up, paint it several different colors and make it all pretty - but that means I would have to pull it out to do it right. I am trying not to do that, yet. I want to see it run first! But I am still waiting on parts... Sitting on my hands with no status from the company I ordered stuff from is slowly driving me bonkers.
10/27/2016 - Patience is rarely my strong suit... I have been trying to be patient, I really have. I ordered a bunch of parts from a company up in Illinois called Ideola's Garage. It's a small business, not a large corporate entity. I like supporting small businesses whenever I can, having owned several of my own in my lifetime. They gave me a lot of hope as they are one of the very few companies out there who specialize in Porsche 924's and they have a wealth of valuable information online. They have been active online for years, have a good reputation it seems, the owner was responsive to my queries before the sale, but after I surrendered a couple of grand worth of cash, getting an Email response from the company has been rather difficult and disappointing. And there is no phone number to call - just Email. It took some prodding to find out if they had even received my order. I never got any sort of Email confirmation at all that they had even recieved my order in the first place, that it was in process or any sort of status report at all.. Which scares me. Like many small businesses, they don't keep everything they sell in stock - they had to order the parts in order to fill my order. Which I can fully understand, having owned several small businesses in the past. I know how that shuffle works, I have done it myself. But at this time, my complaint rests with "What's happening with my order?!?" No communication about my order and no response to several after the sale queries and questions becomes quite maddening - especially after handing over that kind of money I never wanted to spend in the first place.
Having been ripped off through the Internet before, by other people, the silence is slowly becoming quite un-nerving.... It makes me nervous. It makes me very wary. The longer I go without some sort of confirmation or status info, the more nervous and afraid I become. Which doesn't bode well for my customer experience. I've got a wounded Porsche in the barn up on jack stands awaiting repairs, the parts I need are out there in limbo and I am sitting here with an empty wallet trying not to be nervous. I have been trying to be patient, I really have. I have gotten much better responses from eBay vendors than I have this place.
I am still sitting on my hands and finding other parts of the project to concentrate on while I wait for some sort of word from Ideola's Garage.
10/30/2016 - We attacked the 1987 Donor car today. We put it up on jackstands and prepared to remove the wheels so we could take them to Discount Tire on Monday and have the old dead tires removed to allow us to sandblast, paint and refurbish the wheels... (And put new tires on!) That's when we discovered the wheel-locks! And of course the wheel lock KEY is nowhere to be found... Luckily, Buchanan Locksmith Services in Brenham TX has a 24 hour number and I got to talk to someone who will come out sometime next week and pick all those locks for me so I can remove the wheels. Thankfully, they answer their phone on Sunday evenings! Removing the wheels will also allow me to start disassembling the suspension and brakes in preparation for transplanting to the old 1977 Porsche 924 in the barn.
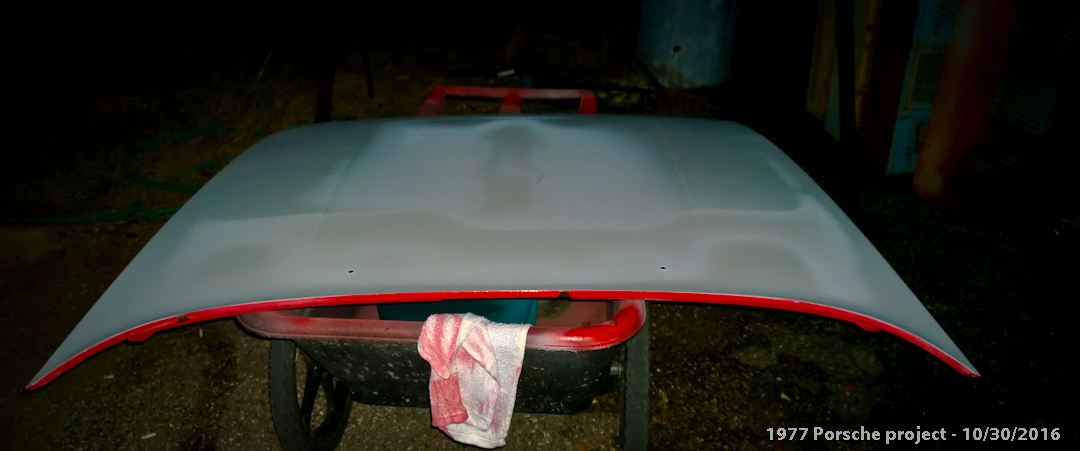
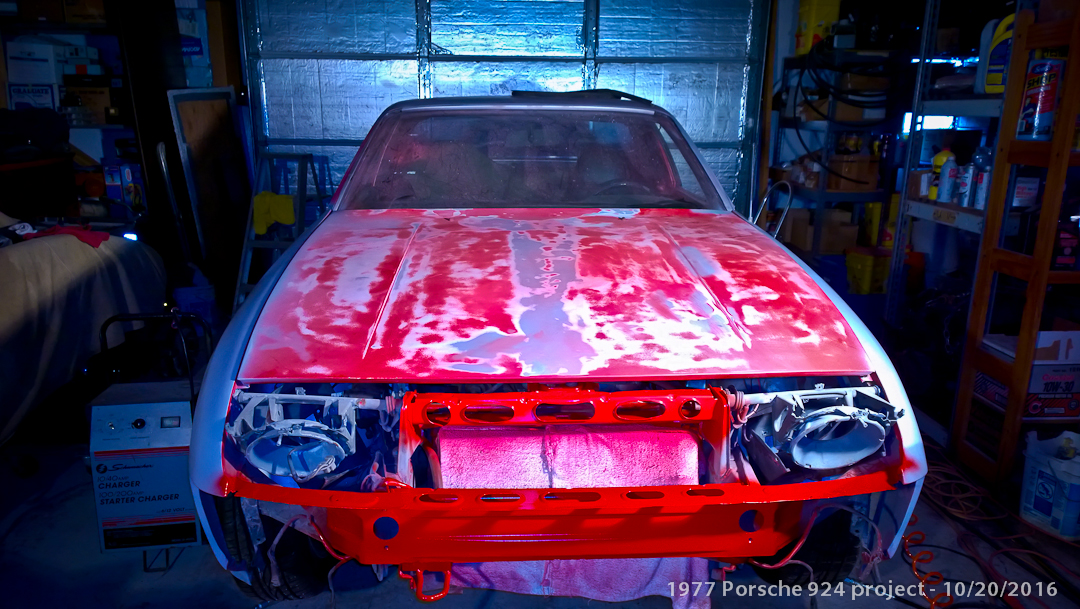
We removed the hood and power washed the underside half to death, Thomas removed a bunch of peeling paint and sanded everything smooth. We applied the first coat of primer to the hood and let it dry - and attract bugs! There's at least half a dozen little gnats entombed in the paint job now... The sanding cycle will remove them but they still piss me off! I don't know why but these bugs are attracted to the smell of fresh paint! We got a good coat of primer over a lot of little tiny bondo spots on some chips I found on the body too. Now the entire car has primer on it! And Thomas got to sand all the overspray off of the brightwork and rubber while I removed all the overspray on the windows with paint thinner. I should be able to start masking everything off with paper and tape for the final coats of paint the middle or so of next week.
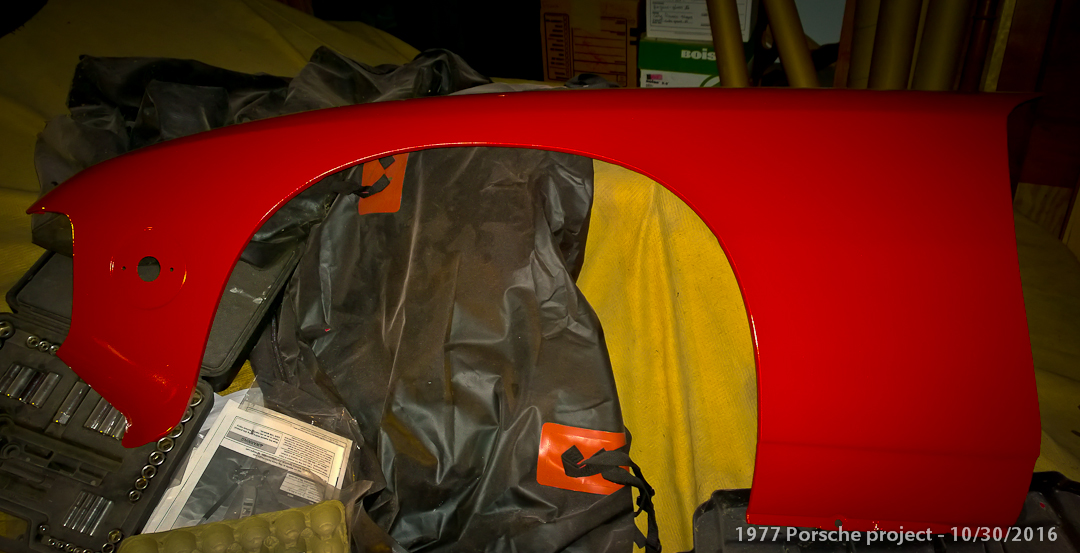
We also shot the first, second and third coat of paint on the repaired driver side front fender! It's starting to look nice and shiny - except for a few bugs... A couple of more coats and it will be ready to reinstall on the car...
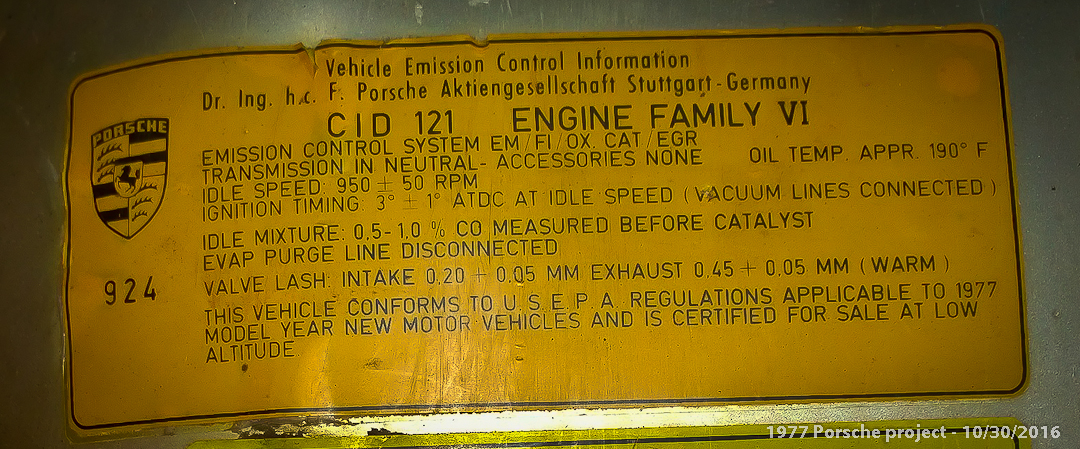
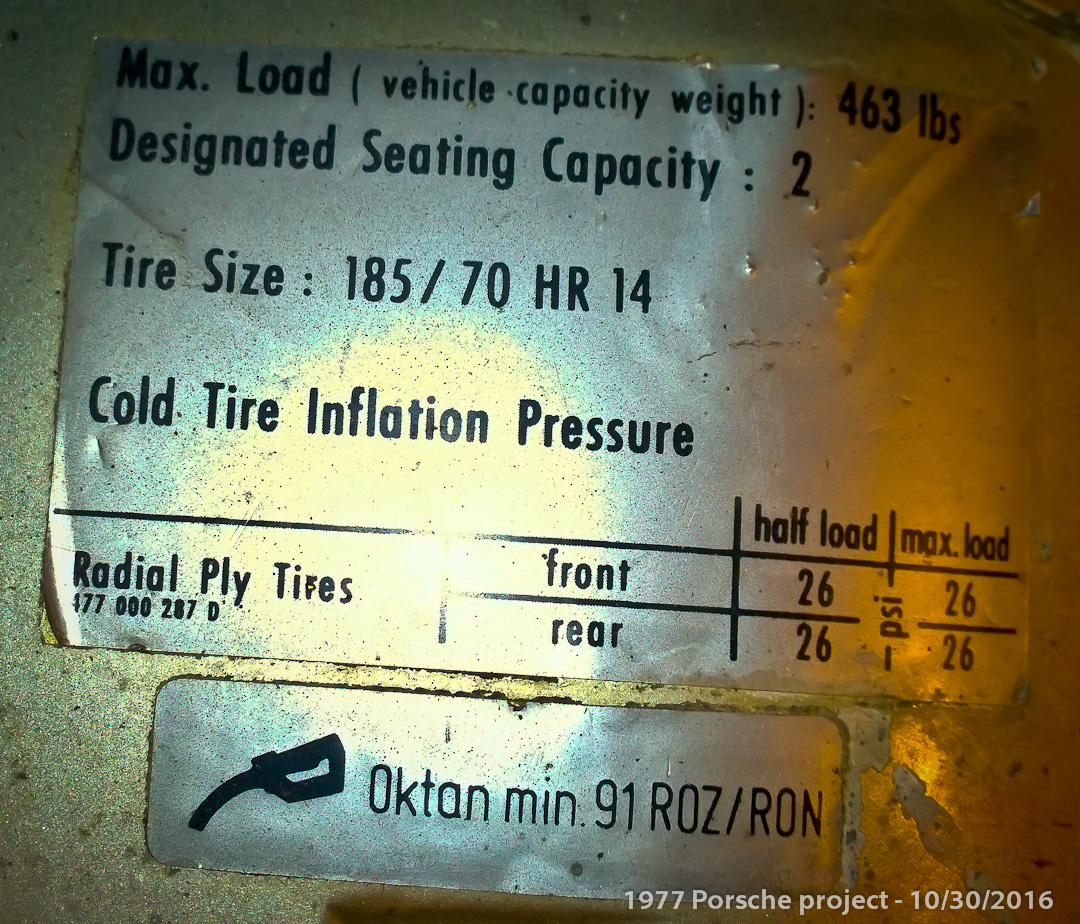
We started prepping the engine bay for paint. The stickers on the inside of the fenders will be removed, the wire brush will be employed, a lot of soap and water and some chemicals to remove all remnants of dirt, oil and grease - all in preparation to re-paint the entire engine bay silver. It will be a lot brighter when we get done with it! But it sure would be a lot easier if I removed that non-running (yet!) engine...
We got a lot done this weekend... It is slowly progressing... I get to make a run to Harbor Freight and Discount Tire after the locksmith does his magic... There is so much work left to do...
10/31/2016 - The locksmith arrived today and spent less than a half hour picking all the locks on the wheels. And just as I had feared, several of them were locked up tight with RUST! We pitched the locks in the trash - never to be used again. He actually apologized for the trip charge and the fees - I told him that a $65.00 trip charge out to the farm in the boondocks and $25.00 for his services were a small price to pay for me to be able to proceed with my repeatedly delayed project. I figured it was going to be around a hundred bucks anyway, and it actually came in below that, so I'm Good! Thank you Buchanan Locksmith Services!
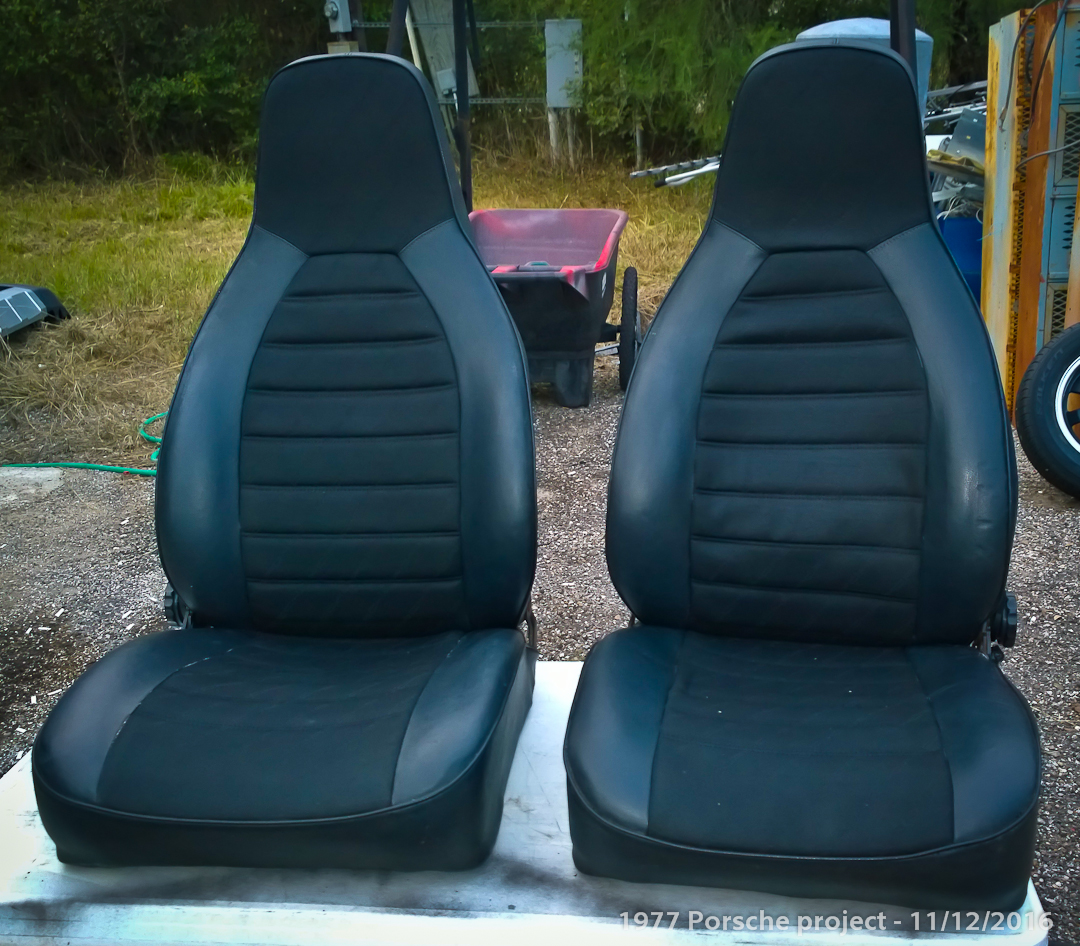
After the locksmith left, I quickly yanked all four wheels off of the donor car. While I was at it, I also yanked both of those moldy looking and stained front seats out of the donor car. I went into Brenham and dropped the seats off with a detailer shop called "Pro Clean" to see if they could steam clean them, make them look better and get rid of the mold growing on the center panel inserts. These seats actually work like they should - as in they actually flip forward and back and can be adjusted, unlike the seats in the old 1977 Porsche with the funky looking screaming HOT PINK leather inserts (that used to be red but faded in the Texas sun). Hopefully I will get them back in "serviceable condition", I am NOT expecting miracles.
I took the wheels to Discount Tire and had them remove the dead tires - and BOY did they jump on it! They had the old tires off, the old wheel weights ripped off and the valve stems removed before I even got out of their parking lot to go find dinner! I ordered four Bridgestone Potenza RE-71R 205/50/R15 autocross tires from them. "Will H." at the Brenham store was very helpful! According to experienced autocrossers on the Internet forums, these are the perfect balance of summer time street/track perfomance for this 924 of mine! They apologized that I would have to wait a week for them to come in from Chicago - I explained that's OK, because these aren't your normal tires that they would normally keep in stock for someones mini-van! And to top it off, Discount Tire BEAT Tirerack.com's price on the tires! Hell, I'm just happy I am able to get my "first choice" in tires at all! Besides, the one week lead time gives me plenty of time to sandblast, paint and refurbish these ugly old 15 inch rims off of the donor Porsche and make them look pretty!
I see a lot more power washing, sandblasting and painting in my immediate future...
11/01/2016 - My Paragon Products order is arriving today courtesy of my friendly UPS guy! Now I can finally replace all those funky sized, hard to find and specialized coolant hoses on that Audi/VW/Porche engine! My local AutoZone wasn't able to help me, but these guys got them all together in less than a week and got them to me via UPS! I am one more step closer to having this engine up and running like it should.
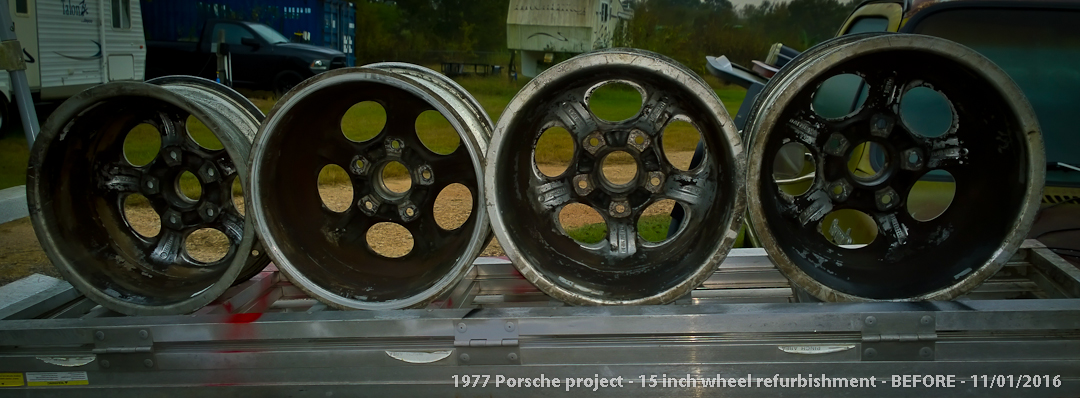
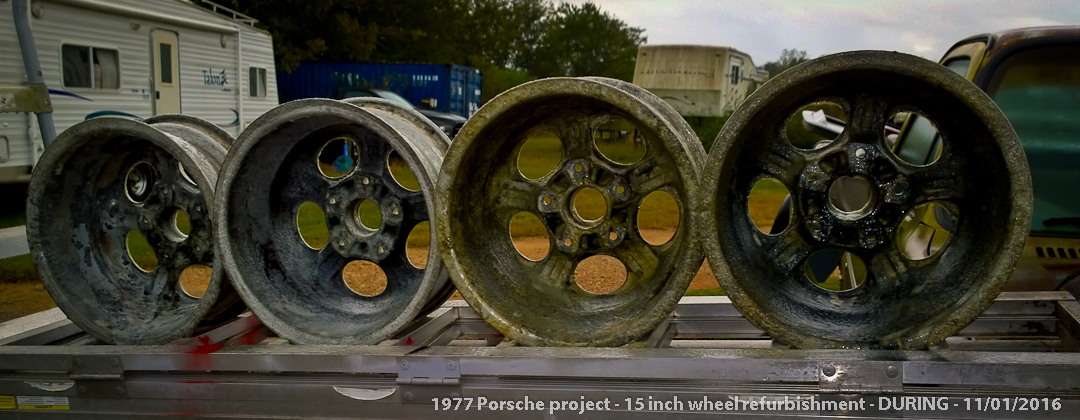
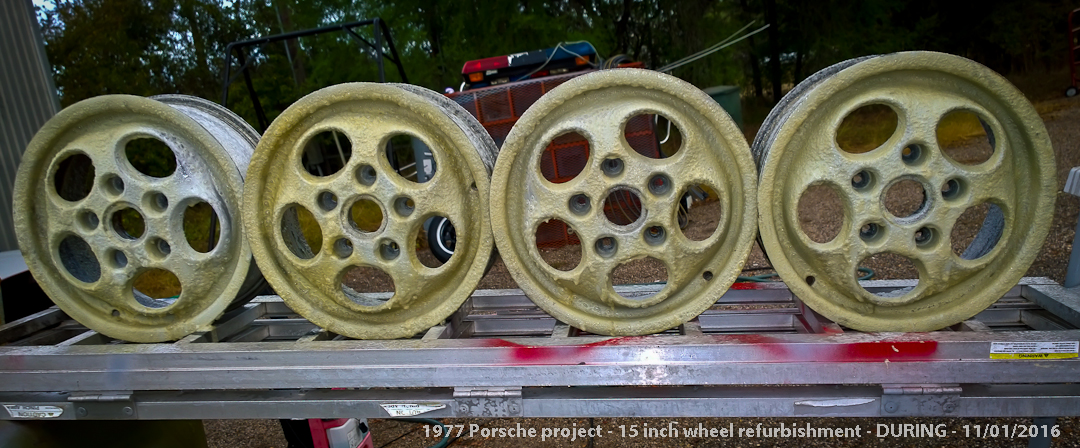
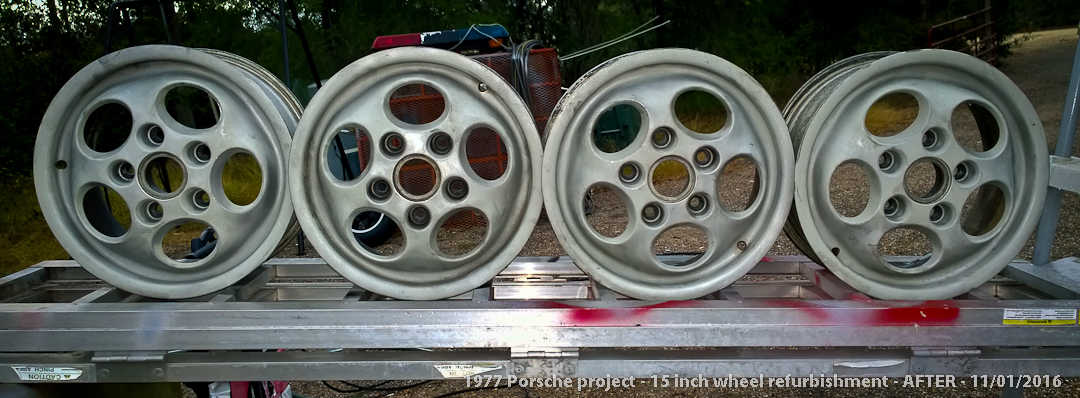
I attacked the 15 inch five lug rims this morning with some chemicals and a power washer. The photos above are from L to R - before, during and after. Three cans of Easy-Off oven cleaner took years of crud, gunk and corrosion off of those wheels in the matter of a couple of hours. Another shot of Simple Green grill cleaner got the rest of it off, along with most of the original paint! Now that I am down to mostly bare metal, I can sandpaper and sandblast them to get them all smooth and uniform before painting with special wheel paint. As I finished, it started raining. So I am pushing back the sandblasting a little, waiting for things to dry up.
11/02/2016 - After a little sanding, a bit of priming, a lot of time masking and a bit of patience and painting, I can say that it's been a long day. After 2 coats of primer, 3 heavy coats of silver and 5 coats of black wheel paint, the five lug rims are starting to look pretty good! Now I need a few coats of high gloss clear coating and they should be ready... My parts order from Paragon showed up, so tomorrow I should get started on the coolant hose replacement project. Thanks UPS! I would have gotten more done today, but I got busy taking cats to the VET to get fixed. Now we have some drugged up kitties with no testicles snoozing on the couch...
11/03/2016 - I fired off yet another Email to Ideola's Garage wanting a few answers to some simple questions and a status check on my carb kit order. Still no reply to my previous queries. I know he has a day job, but 10 days waiting for an answer to some relatively simple questions is getting to be a bit maddening... And a few hours later, he responded with answers to my questions and some valuable information! YAY! He is obviously a very busy guy...
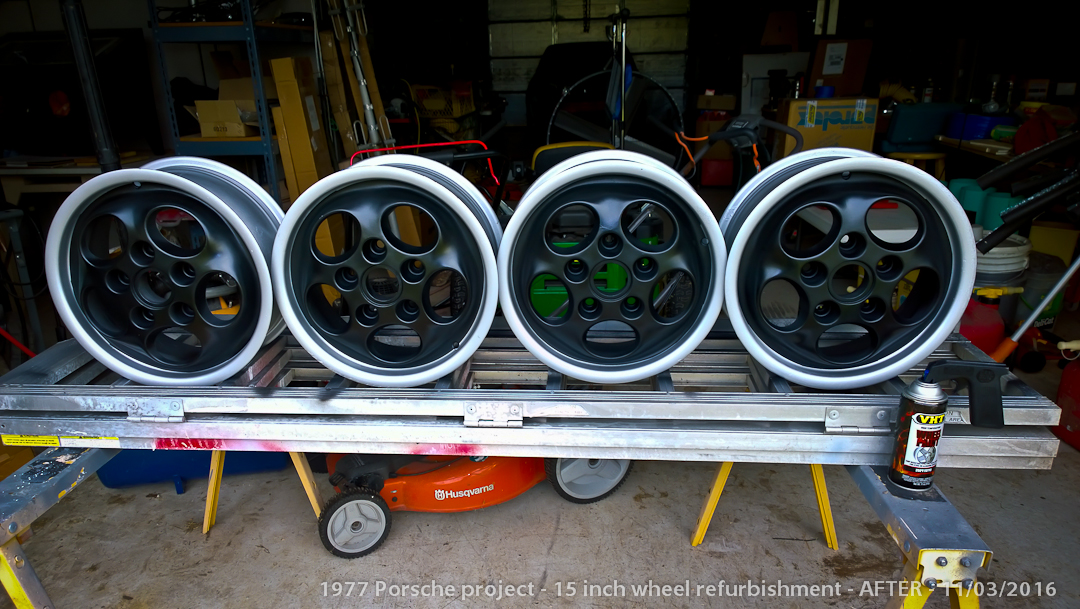
I finished off the rims refurbishment project. Now I need to take them down to Discount Tire and get the new tires installed... I think they turned out rather well - and no bugs in THIS paint job, I did it in the cool of the night inside the barn with the fan going. That will teach those little bastards! After more than TEN coats of paint, they look pretty darn sharp!
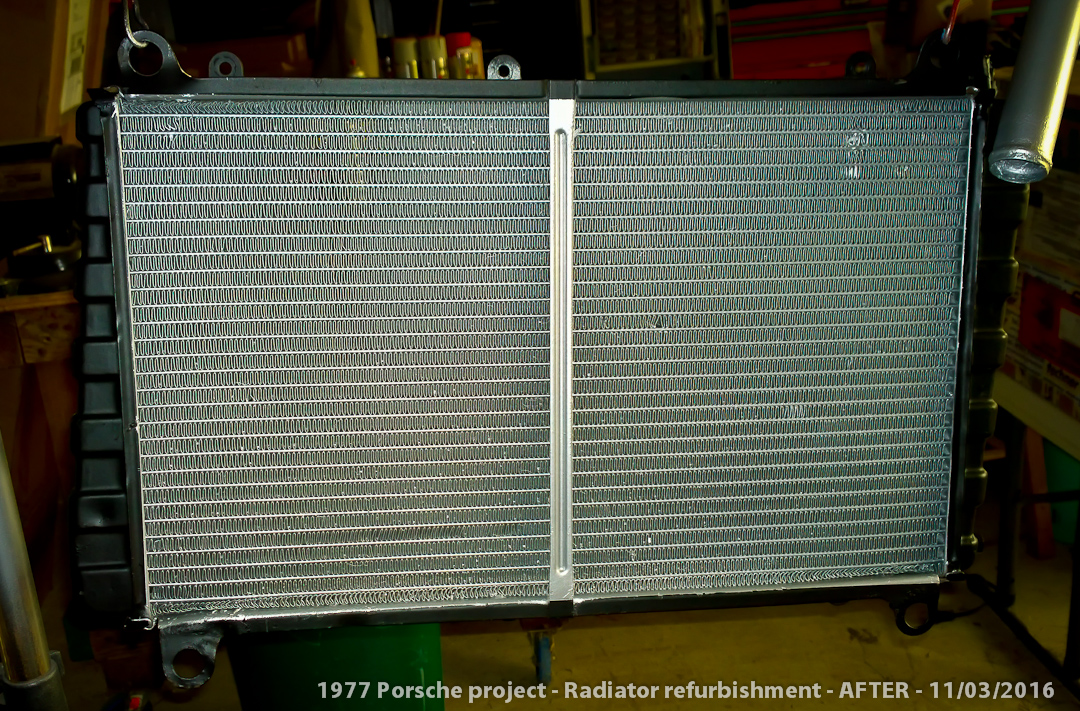
I got the radiator back from Don Harts Radiator shop. It was over 50% blocked! They boiled it out real well, pressure tested it and gave it a clean bill of health. Best of all, I got out the door for less than $160 bucks! They said it should work just fine now. But it makes me wonder, if it was over 50% blocked up with gunk, that little engine must have gotten hot a time or three. I wonder just how good a condition that little aluminum head 4 banger is in after seeing all the things wrong that would make it get hot, break down and eventually get parked under a tree... I am not looking forward to a complete engine rebuild, but if we have to tear it down, it will get the complete high performance treatment... We won't know until the carbs get here...
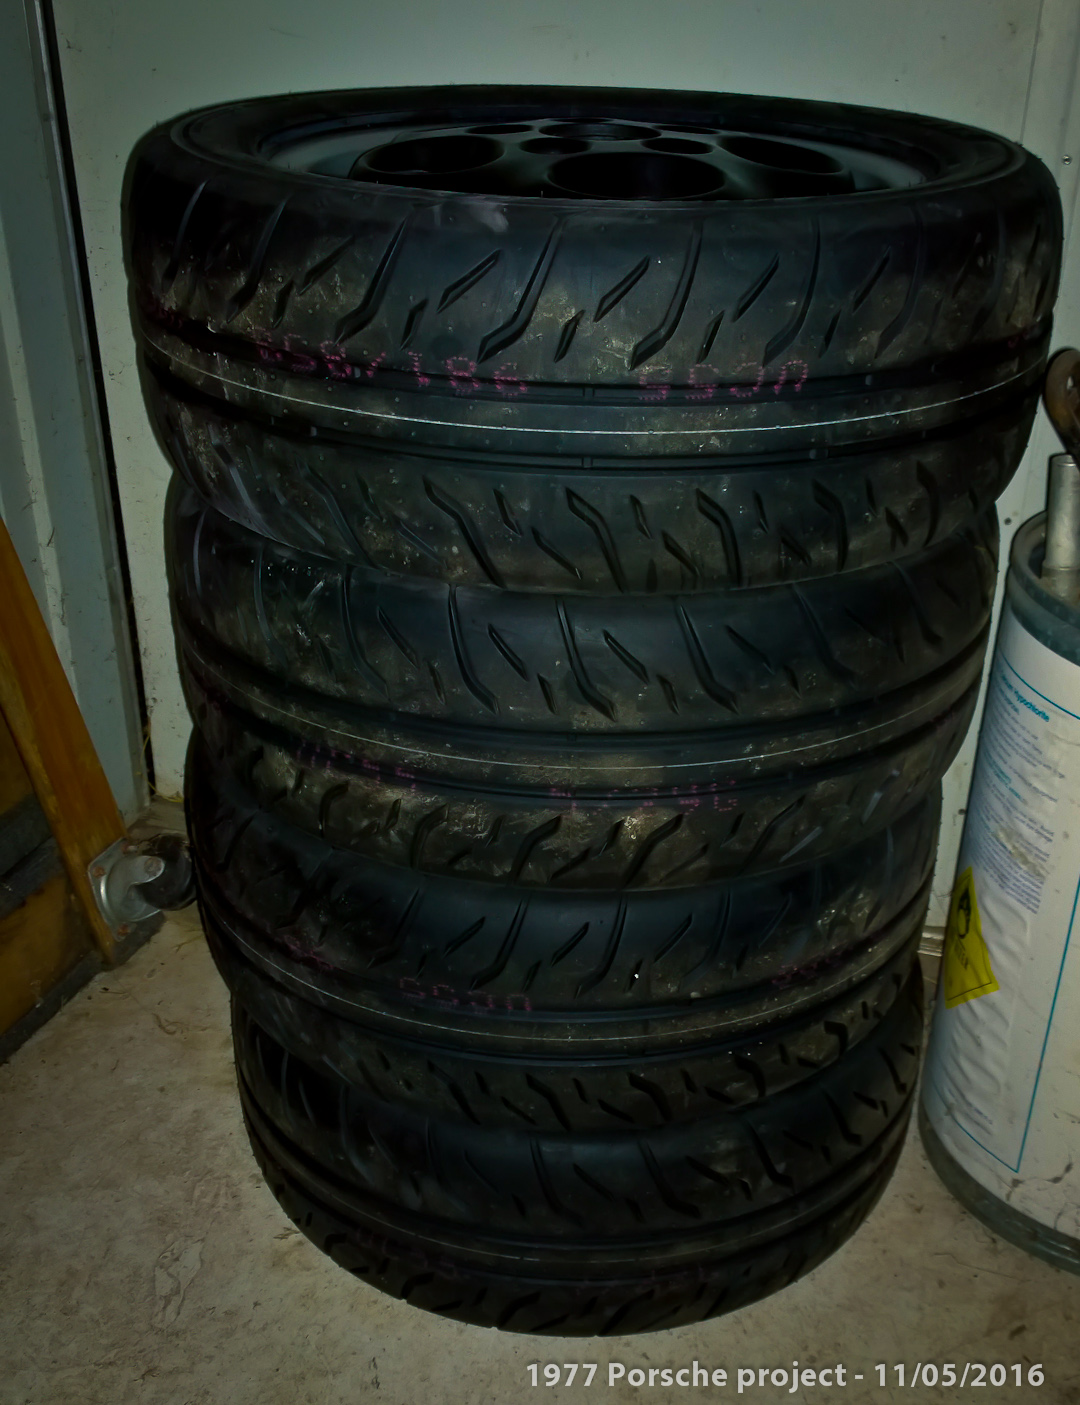
11/05/2016 - I picked up the new tires I had mounted to my freshly painted rims from Discount Tire today! These are Bridgestone Potenza RE-71R 205/50/R15 autocross tires. As you can see below, they are beefy looking with a tread pattern that definitely doesn't say "street tire". They also smell funny and actually feel "sticky and tacky" to the touch - testament to the ultra sticky soft rubber compound! These are going to stick to a track surface like glue! I am impressed... Although I was disappointed a little. I had to go back THREE times to get them to put the wheel weights in the right spot. They kept trying to put them where they would collide with the brake calipers. There's almost no margin for error the caliper is so close to the inside of the 15 inch rim... It's obvious they don't get too many Porsches inside their doors...
I also picked up the refurbed seats from the detailer shop in Brenham. They apologized repeatedly for not being able to get rid of all the stains in the center panels 100%. There is some staining left that is quite visible. I wasn't expecting miracles, but they sure look 1000% better than they did when I dropped them off! I am going to try some black "carpet dye" on the center inserts and see if I can make them look a little better. But I am otherwise happy with their efforts. They did what they could on a pair of seats that have sat in the donor car since 2009 with open windows underneath a big old pecan tree near downtown Brenham, suffering the ravages of time and weather. All things considered, they look awesome! (And everything on them works!)
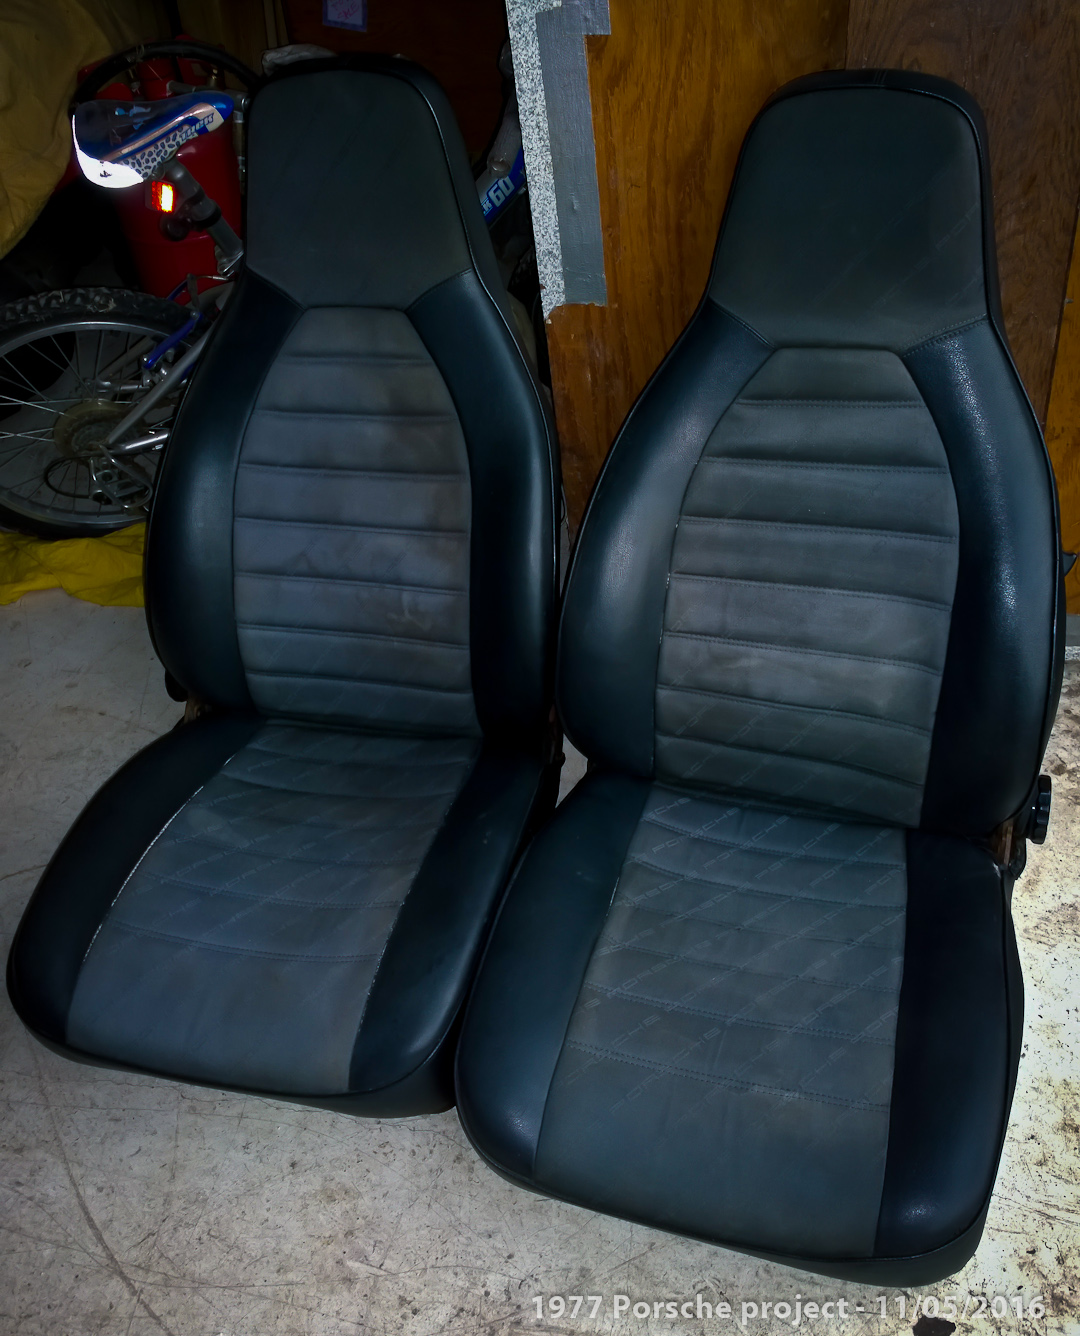
They still look better to me than the black vinyl seats with the screaming hot pink center inserts that are inside the car now! Other than that, I didn't get a damn thing done today... I've been running too hard lately so I took the opportunity for a good long nap...
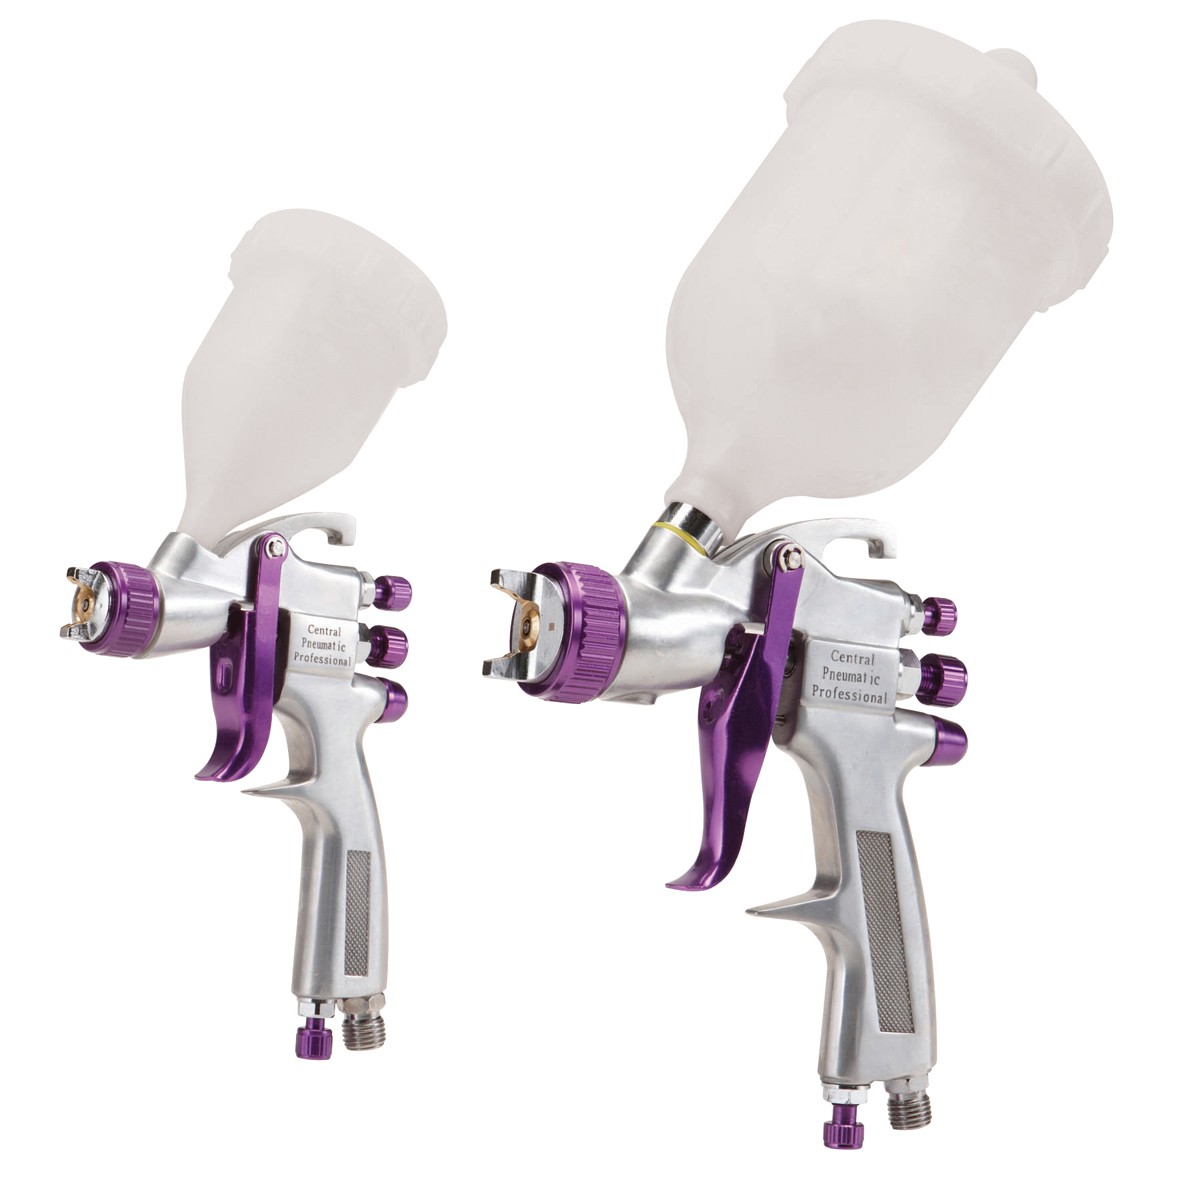
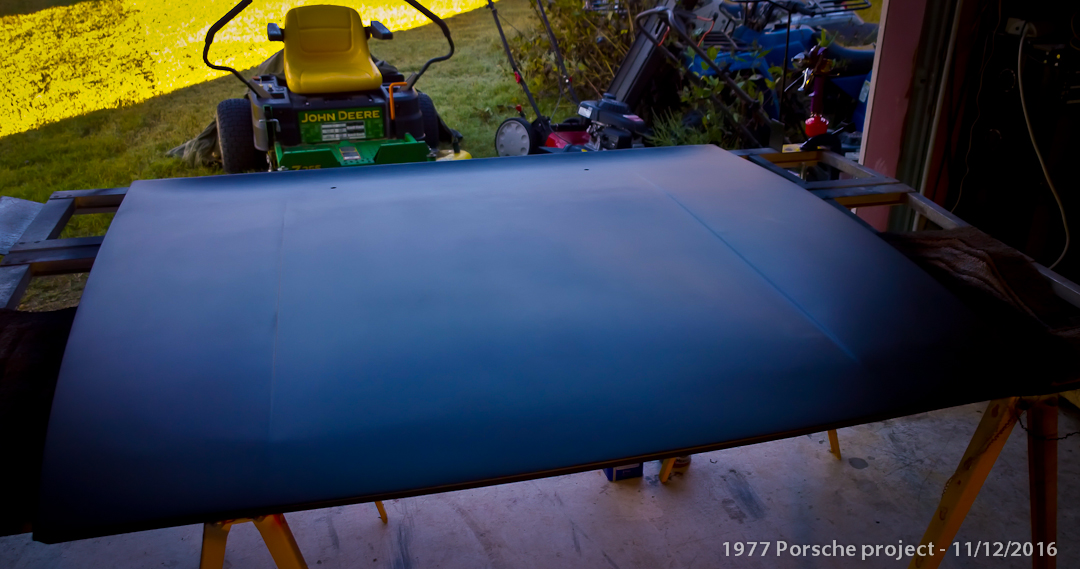
11/10/2016 - Rain has set me back a few days, but we sure needed the rain! The front door on the guest house now closes like it should again thanks to almost three inches of rain! We went to Harbor Freight today and purchased the spray guns and associated bits, pieces and supplies to start painting the hood. We went to Lowes and bought a gallon of Safety Red and Flat Black paint as well as all the Acetone and mineral spirits I would need - not to mention mixing cups, stir sticks, paint filters and a long list of "stuff". It has been years since I have used a compressor fed spray gun setup. My first thing I will be painting will be the one part that is SO easy to screw up - FLAT black! Ask any paint guy and they will tell you FLAT BLACK is harder to paint than you might think. Any screw up and it will be glaringly obvious - and once painted, there is no sanding it or you will screw up the finish, big time... The underside of the hood will be my learning platform before doing the part everyone will always see - the top surface of the hood.

11/11/2016 - We ordered a lot more parts for the suspension conversion from Ideola's Garage and set to work on the hood. The carb conversion kit arrived via FedEx too! The hood was prepped for paint and I went about shooting three coats on the underside. 1 part acetone to 3 parts paint and a lot of patience shooting two thin coats to get everything covered and one thick coat to give me a good finish on the underside. Getting a good coat of paint in all the little recesses, curves and structural bits was one hell of a challenge - but it came out looking pretty good! The top side terrified me - I can't screw this up! I went over the surface with 320 grit sandpaper and then again with 400 grit sand paper and the top side of the hood was about as smooth as I could make it. I setup my gun, grit my teeth and went after it with the new paint gun. The first coat was a light fog and took what seemed like forever. The second coat I applied a little thicker. After a couple of hours of curing under the hot lights in the slip stream of the bigass fan, it looked awesome! No tiger stripes, no funky texture and a completely even finish! It just took a really long time to flash off and dry. Between my bigass fan and a bunch of halogen lights, the finish was hard by the time it got dark and started turning cool outside, so I let it cure overnight. Another couple of top coats tomorrow and the hood will be done and ready to wrap with carbon fiber! Even though the coats are extremely thin, it is drying to a smooth, FLAT, even, hard as nails finish...
(Pats myself on the back...)
I will say this about using the compressor fed spray guns again after so many years... What a bitch! I didn't remember what a pain in the butt it was. It's totally different than working with rattle cans. It sprays different. It gives you a "fan" for a spray pattern and it comes out more like a "fog" than the cans will ever do. It is MUCH easier to avoid paint drips with this method! But the real bitch was disassembling and cleaning the guns in between each coat of paint. If you leave them alone for more than five minutes, they will dry up and sieze. I wasn't going to let that happen! But I ended up with a much much better result and finish than I could have ever gotten with a rattle can... (YAY!) It was worth all the trouble!
The supplies to dye the seats black arrived this evening via UPS from Amazon. I am looking forward to masking off the seats and shooting the fabric inserts with black carpet dye tomorrow!
11/12/2016 - First task after dawn was getting the donor car seats looking like they should and not like they were just pulled out of a swamp recently... They were very clean after a trip to the detail shop, but many years of sun exposure had them faded and many years of weather exposure had them stained pretty badly. The fabric center sections were a faded, dingey looking grey. Thomas masked off everything on the seats we did not want to "dye" black with painters tape. It took a little patience, but it would be rewarded. It took far longer to mask off the seats than it did to actually dye them, but the secret to a good job is all in the prep work!
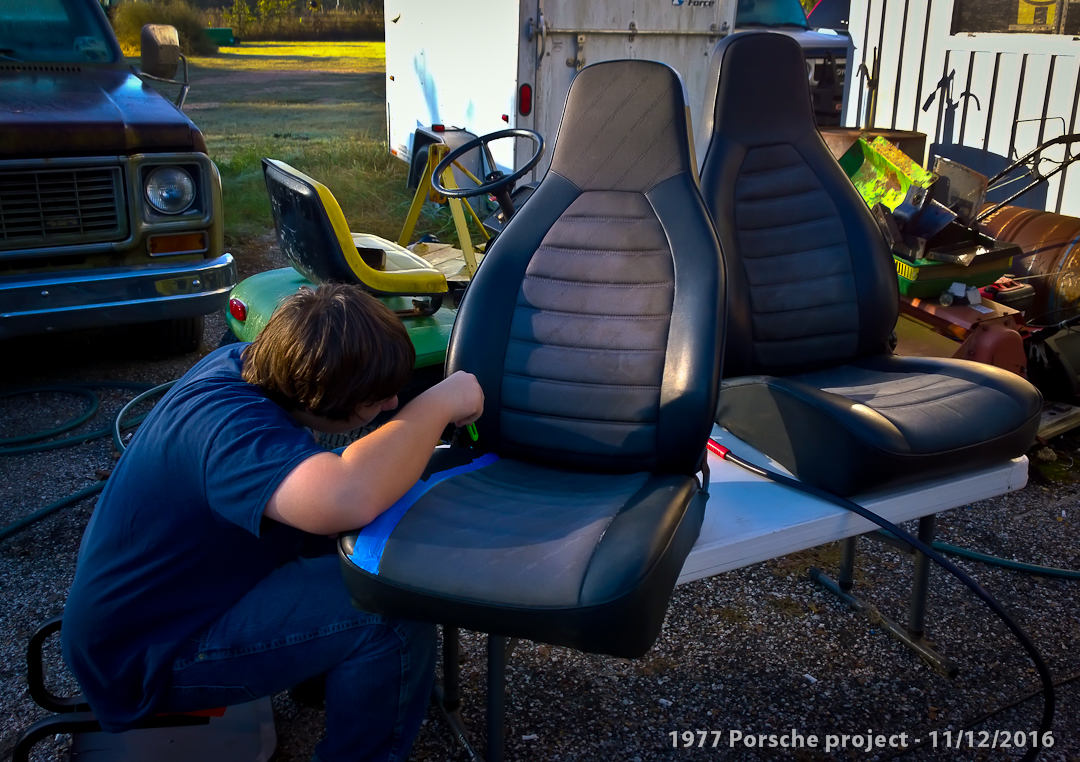

Next we shot it with "wax and grease remover", then shot it with "adhesion promoter" and then shot it with Dupli-color black carpet and fabric dye, allowing everything to flash off and dry between two coats. The transformation was wonderful, dried amazingly quickly and now they don't look like they have been pulled out of a swamp with mottled stains in the center fabric sections. I think they turned out rather well!
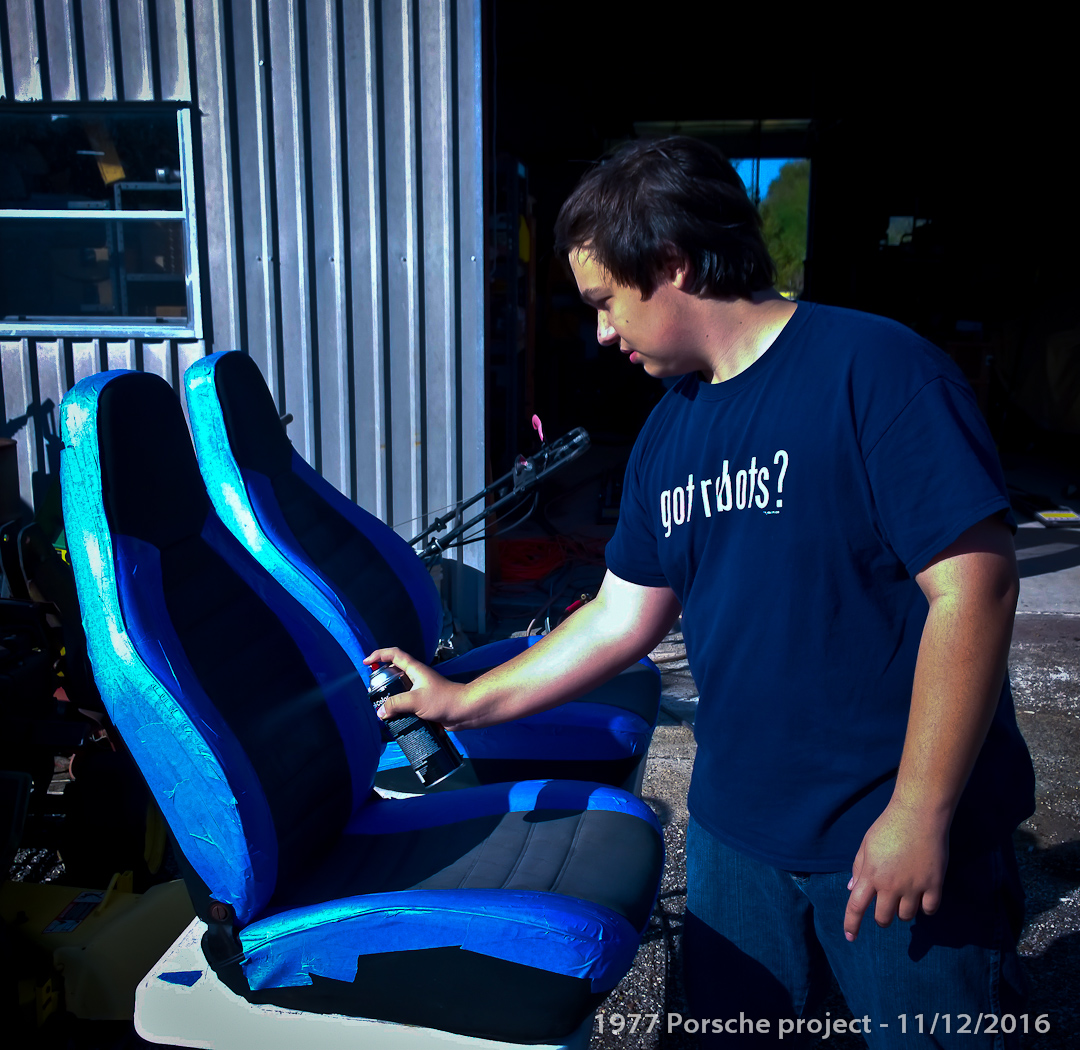
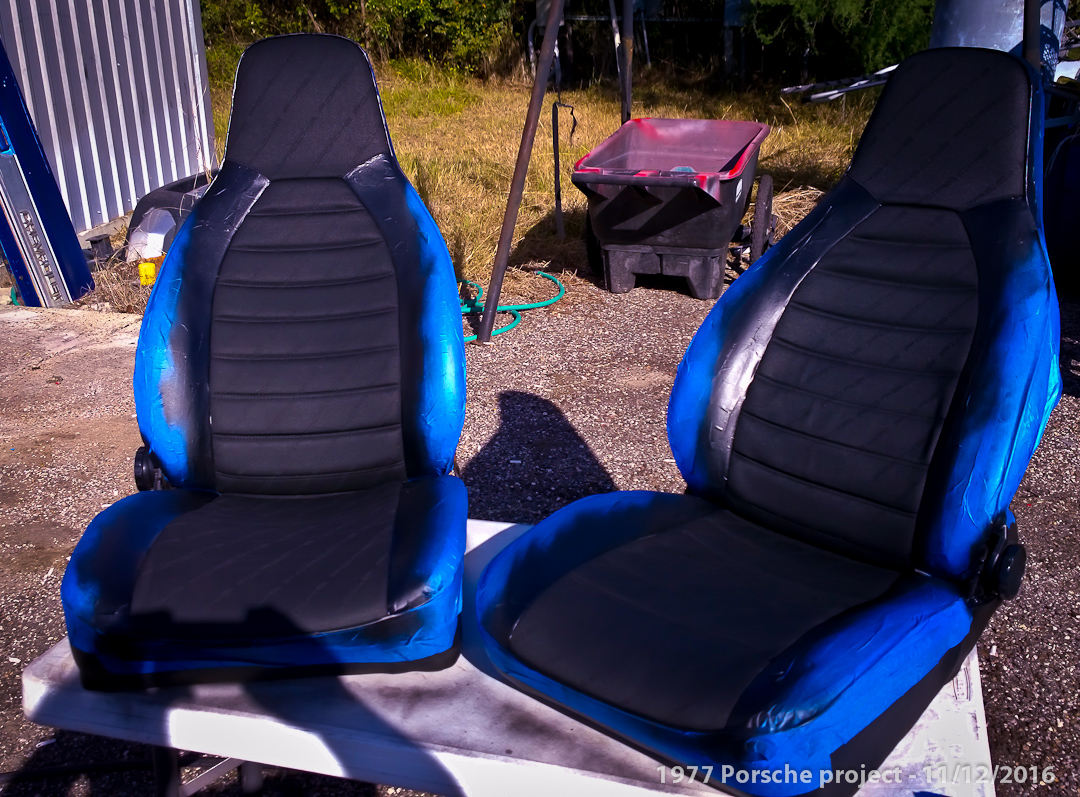
The Before and the After photos
While Thomas was busy with the seats, I went after the Porsche with some soap, water and a power washer to get rid of all the sanding dust... Exposing a lot of little imperfections in the primer job and showing me places that need more sanding... I swear, the sanding never seems to end!
After all that work, I laid down for a nap and woke up late and didn't get a chance to hit the hood with its final coat of flat black... Tomorrow is another day, right...?
11/13/2016 - We had to wait until the humidity level went down today to paint the final heavy coats of flat black on the hood. It was at 80+% most of the day with heavy cloud cover and a "10%" chance of rain. Which basically means intermittent short showers around here. No bueno for painting... Finally, near sunset, while it was still warm enough (72 degrees) the cloud cover broke and the humidity went down to 52%! So we got with it and shot that last two heavy coats of flat black on the hood, within 15 minutes of each other as it dried really fast today... It's done! In about 7 days after everything is cured, we can put on the carbon fiber film!
Decision day on the car wrap film project has arrived...
11/14/2016 - The hood has now dried to the touch and cured overnight. I was able to blow and swipe off some dust that had settled on it overnight and no scuffs or scratches! So the new paint guns have already paid me back! I am proud of that matte black finish and it will be there for a long time to come. It still has some curing time before we can wrap it, but it came out great. By the time the wrap supplies arrive it will be ready to go.
Since the hood is finished and we are itching to see what it is going to look like sooner rather than later, we ordered the wrap film from carwrapsupplier.com. In my mind, a rather large order! The whole order, including supplies and specialized tools came to $977.75. Thats' about 300 bucks more than I had anticipated. But, it is still cheaper than a commercial paint job, but ouch! They sent me a "color deck" with all the different types of vvividvinyl.com film they carry. It is a darn good thing they did! It made making the final color and texture decisions a much less aprehensive process. There are so many colors to choose from, so many textures and gloss levels to choose from, and so many patterns - it becomes a bit mind boggling! But that little book they sent me made us much more happy and secure with our choices. Here are the two films we chose...
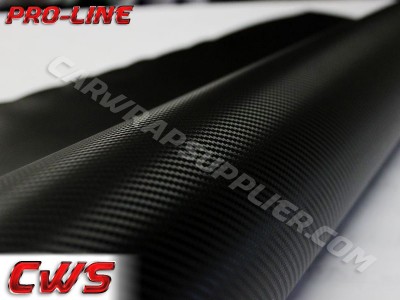
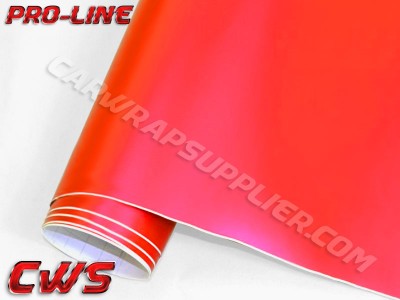
For instance, the mirror finish glossy red I originally had my heart set on was easily scratched as I dragged my thumb across the surface of the sample. (YIKES!) That isn't going to work for us! It makes it totally unsuitable for us as we live on a dusty, dirty, gravel road! However, the matte finish of the same mirror film didn't scratch at all! It's more like a "diffused mirror finish" and sort of "shimmery". So guess which one I picked... The matte finish! We selected a carbon fiber film that you can actually FEEL the carbon fiber texture, and it didn't scratch when I ran my thumb across it. To be honest, it feels kinda sexy... These choices will give us a long lasting finish, with low maintenace and easy washability. That's important when you live on gravel roads! I think it is going to look pretty darn cool when it is all said and done with the contrast of a shimmery red body and the black shimmery carbon fiber hood and roof. It will certainly be more durable than a regular paint job! Now we start a waiting game. Now I get to sit on my hands and wait for the FedEx guy!
We did some more sanding on the body today. The roof is almost as smooth as glass now... The rear fenders have no more "grain" to them. But I found a couple of spots I need to fill with some putty tomorrow. Once that is sanded down smooth, it will be time to shoot it with paint. Hopefully we can get a couple of coats on it before the weather turns cooler. It will be done in two parts, red all over the body and flat black on the roof.
11/15/2016 - I swear, things go wierd when you least expect it. I was doing the last 320 grit sanding of the entire body in preparation to finally shoot the red paint when I found a small chip on the rocker panel. I blasted it with compressed air to remove the sanding dust so I could see what I was about to deal with, and a CHUNK blew off... And then another chunk and another chunk and then another chunk the size of my hand came off on the flloor. Within less than ten minutes the whole damn rocker panel became exposed and I didn't scrape, scratch of other wise rip the "chip protection" coating off - I just hit it with some compressed air and it flaked off in my hands! After a few more minutes, both rocker panels are now exposed and totally devoid of "chip protection" material...
Which isn't too big a deal, I will just shoot the panels with some bed liner stuff and be done with it and it will probably be better than the stuff they used back in 1977 at the factory. But damn... That was an unwlecome surprise and set me back several days.
While I was doing this, I discovered that the automatic transmission rear suspension on the 1987 924s donor car is NOT a "bolt in upgrade" for my old 1977 924 race car... It's close, but it bolts in differently into holes I don't even have on the 1977 car. I don't know if I can still use the spindles to swap over to 4 wheel disc brakes and five lug wheels. But I sure as hell can't uses the suspension components! This also is a setback I will have to research and I will need to figure out what to do next...
11/17/2016 - The new front springs arrived via FedEx today. The wrap and supplies order arrived via FedEx too! UPS brought the strut tower brace all the way from Germany. This will probably be a busy weekend...
11/21/2016 - We ended up having lots of "other" things to do over the weekend, so I didn't get much done. Sometimes life gets in the way of your hobbies... But I found a complete rebuilt engine on eBay way up in the middle of Iowa about 1000 miles away from where I live. I correspnded with the owner and setup a meeting - on the day before Thanksgiving. Which meant I needed to make a mad dash to the frozen North tomorrow... I also stumbled across a 1987 Porsche 924s in Dallas at Gas Monkey Garage. I figured since we will be passing through, it would be a good chance to go by and LOOK at it to see if I wanted to place a bid.
11/22/2016 - Thanksgiving is one of those times of the year I
normally stay home, off the roads and let other people have the opportunity to
go kill themselves at the hands of some amateur drunk driver coming home from
Grandma's. Getting me to drive on holiday weekends is like pulling teeth...
That being said...
We made a mad dash to Iowa to pickup a rebuilt engine for one of my Porsche
projects. I found a complete, rebuilt motor for a steal of a deal on ePray. I
couldn't pass it up!
The only problem - it was smack dab in the middle of frickin' nowhere Iowa! It
would take a few days to get there and back and the only time I was able to do
it was over the week of Thanksgiving...
We made the rash decision on Monday evening to head North - during Thanksgiving
week no less - what the HELL was I thinking?!? By noon on Tuesday we were
hauling ass to the frozen North at a high rate of speed. I had a stop to make
along the way in Dallas to look at a car I stumbled across on the Internet.
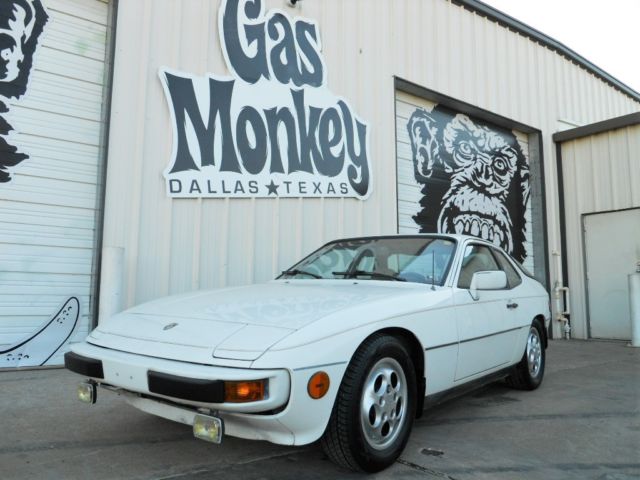
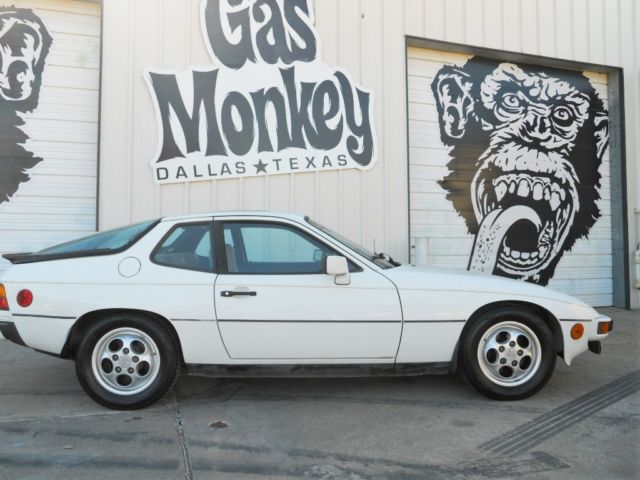
While poking around on ePray I found a used 1987 Porsche 924 at Gas Monkey
Garage. I figured it was worth a look, if nothing else. It looked promising, but
looks can be deceiving!
I had an appointment with "Tony" at 4pm in Dallas at the Gas Monkey world
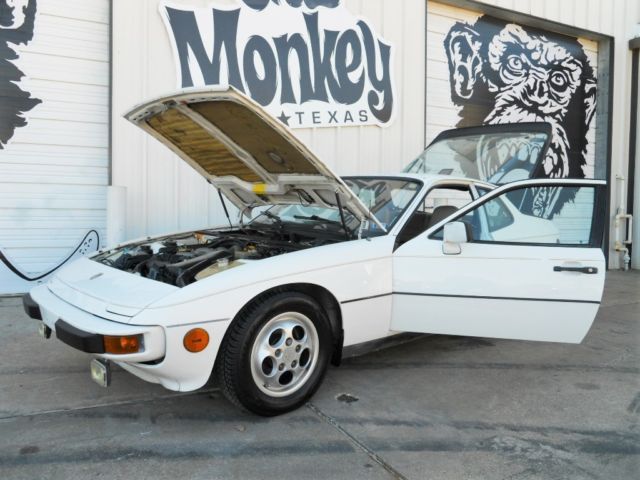
headquarters. We met up and I went over the car. It was unbelievably complete,
all original and it even had the original tool kit in the trunk! The original
spare tire had evidently never even been put on the ground - it obviously spent
its entire life inside a cozy garage. You could almost eat off of the engine bay
it was so damn clean... It had only 2 owners in its life, the guy who bought it
and his widow who had recently relocated to Dallas to be closer to her kids.
It had only ONE problem, a "tick in the engine". I put on my doctors stethoscope
and quickly found the culprit, a collapsed valve lifter on cylinder number
three. I knew that familiar "tick tick tick" sound and knew exactly what it was.
I could fix this in less than a half hour for less than a hundred bucks! I knew
I had to bid on this car!
We said our goodbyes and got back on the road, knowing that I am going to have
to bid on this in the hotel when we stopped to sleep...
I bid at the next stop... And within five minutes got outbid! Damnit...
We continued on to Iowa and picked up the engine for the Porsche project in the
barn up on jack stands. We found my prize hanging from chains dangling from the
ceiling in a guys garage in a little town in the middle of nowhere Iowa. He also
threw in a 4 speed transmission in on the deal... We paid the man and then
turned right around and headed home. 15+ hours of driving... And another 15+
hours of driving home... What the fuck was I thinking?!?
11/23/2016 - The engine was now in the bed of the truck nestled
between a couple of old tires and tied down like a Christmas turkey... With a 4
speed transmission keeping it company.
I bid again at the next stop... And within five minutes I got outbid again!
I bid again at the next stop... And within five minutes I got outbid yet again!
That was one hell of a long hard road trip... I needed to make it REALLY worth
it and see if I could snag that car in Dallas too! I needed to make my next bid
in such a way so that "Mr five minutes" couldn't outbid me!
Along the way as the auction was closing, somewhere in the middle of Kansas, we
pulled off of the highway and into a road side "rest stop" full of snoozing 18
wheeler drivers and pulled out my laptop, logged onto ePray and sat in the glow
of the dashboard waiting for the last 6 seconds of the auction in Dallas to put
in my highest and last bid.
8:15pm in the middle of nowhere, somewhere in Kansas, in the dark, with 18
wheelers whizzing by at 75 mph and here I am on my computer on Mrs P's "hot
spot" in her smartphone... What the fuck was I thinking?!?
I was thinking "I'm gonna get that damn Porsche!" Some fucker out there on the
Internet had countered each one of my previous bids within minutes... I wasn't
going to let that happen again - I was going to snipe him by tossing my highest
bid into the ring in the last few seconds, not allowing "that guy" a chance to
react...
ONE more bid for all the marbles... I didn't want to let this prime, unmolested
example go to someone who probably wouldn't appreciate it...
My finger hovered over the mouse button in the last few seconds...
10 - God I hope this works...
9 - My wife is gonna kill me if I bid too high....
8 - Where am I going to put this damn thing?!?
7 - I'll make a spot in the barn if I have to...
CLICK!!!
5 - Pray motherfucker, PRAY! (This is why they call it ePray!)
4 - If I lose it I am gonna be pissed...
3 - Momma needs a new car... right?!?
2 - Now she's gonna be pissed if I don't get it...
1 - Do I have enough money in the bank account tied to ePray?
The next few seconds waiting for the page to update were like an eternity
combined with the vision of slow moving molasses on a cold winter's morning...
Finally, the page refreshed and it said...
Congratulations! you have won the auction!
Hot damn! I WON!
.
And then reality set in...
Hot Damn!!! I WON! Now I have to pay for it...
Damnit... There goes all my play money, Xmas money, spare change and all of my
"beer money" for the remainder of 2016...
.
So now, not only do I have a new engine and transmission for the Autocross car
in the barn - now I own a totally complete, original and great condition 1987
Porsche 924s! It should be delivered to my door in about a week...
This now makes THREE Porsches in the farms parking lot - but this one RUNS and
moves under its own power! It matches the black automatic 87 Porsche donor car
sitting on jack stands, slowly being disassembled for parts. This new Porsche
just had too much going for it to risk passing up...
I got it, it's mine, momma bear is gonna have a new ride to play with. Years ago
I said I would buy her a Corvette, she still hasn't gotten it - but she got a
Porsche instead! (yeah, I am trying to justify it all in my little head, sue
me...)
And then we got back on the highway and hauled ass South still wondering if all
this was really happening! We celebrated my victory at Subway with a sandwich
and some lemonade in a truck stop as we topped off the diesel tank.
(nobody else with any sense was open on Thanksgiving!)
30+ hours of driving kicked my ass... Over four days during Thanksgiving... What
the hell was I thinking?!?
I didn't have Turkey for thanksgiving, I had a steak and cheese sandwich with
extra cheese, some Doritos and a lemonade. How's that for breaking tradition?!?
We are home now. Beaten, battered and sore as shit from way too many hours in a
row in the drivers seat. That was one hell of a mad dash to the frozen North and
back - one I hope not to have to repeat any time soon! Luckily, we had three
drivers to swap off and keep moving...
The real and unsung hero of this trip is Mrs P's GMC 4 door long bed diesel
pickup truck. We woke it up from a slumber of not being used for much of
anything for a month or three. We topped off the tire pressure, poured some fuel
injector cleaner in the tank, checked all the fluids, washed the windshield and
then forced it to make a mad dash across five states, to the frozen tundra and
back - it didn't skip a beat or complain once!
But as I sit here in the glow of my monitors on my home PC I can't help thinking
that I pulled it off! I came home with TWO new toys, and a really cool,
original, totally complete third toy that will show up on a big truck in a few
days...
11/24/2016 - We made it home, late at night, and promptly fell into bed.
11/25/2016 - We unloaded the engine and transmission into the barn and put the new engine up on an engine stand. I was happy, right up until the point that I popped the cam cover off and found dust, debris from broken bolts and a copper washer from "somewhere". The cam was totally dry, devoid of any sort of assembly lube. We pulled off the oil pan and it was the same story but cleaner. Next we removed the exhaust manifold and I ran my fingers in the ports and found black soot on my fingers. This wasn't a "rebuilt" engine, it had never seen a machine shop, they never boiled out the water passages, the didn't do any machine work - they just overhauled it by replacing the seals, gaskets, bearings and piston rings and then painted it - badly...
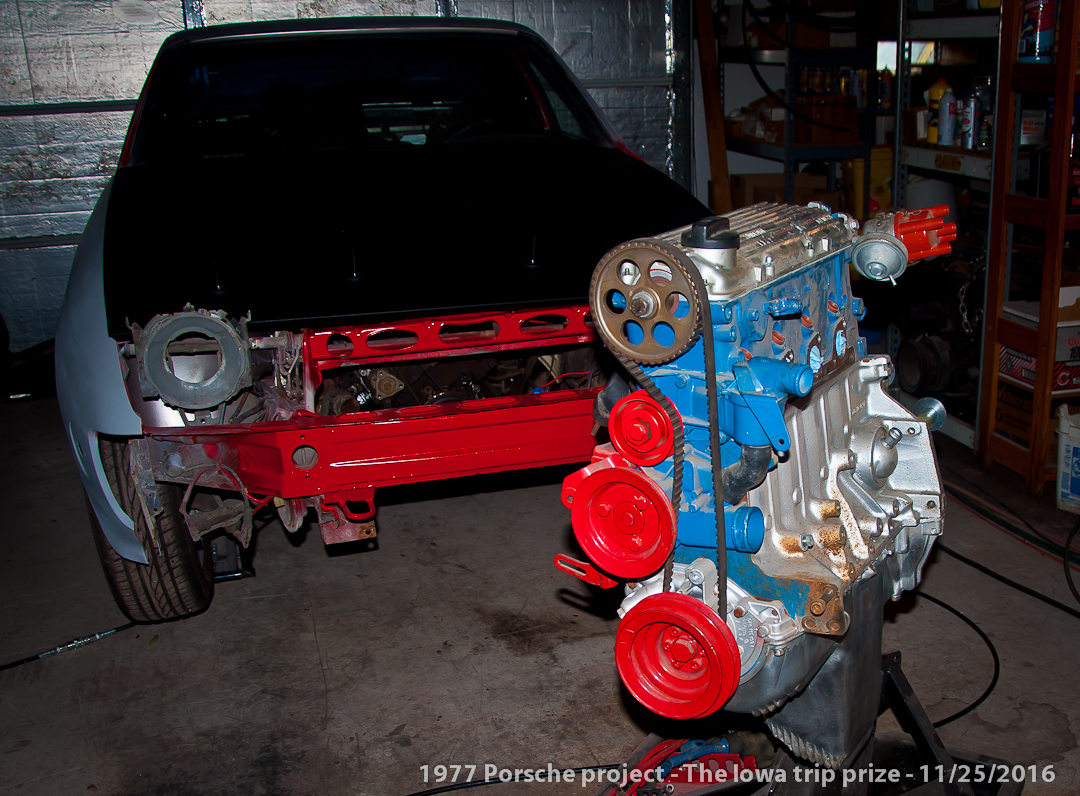
Under normal circumstances, I would be really angry at this point. But I took a different attitude. Rather than depend on some guys word of honor from the Internet "that everything is just fine" I saw this as an opportunity to "do it right"! Obviously, whoever worked on this engine last hadn't rebuilt too many engines, he made too many rookie mistakes. Now I have the opportunity to take it all apart, get MY machinist to go through it, boil out all the crud out of the water passages and make sure everything was within tolerance and maybe, just maybe, do some upgrades while we were at it. I saw this as a silver lining to the whole deal. When we are done with this engine, it will be done RIGHT!
11/27/2016 - Thomas and I removed some brackets, pulleys, the cam cover and oil pan and cleaned them up and put about 5 coats of paint on them, set them aside and let them cure... They look awesome at this point!
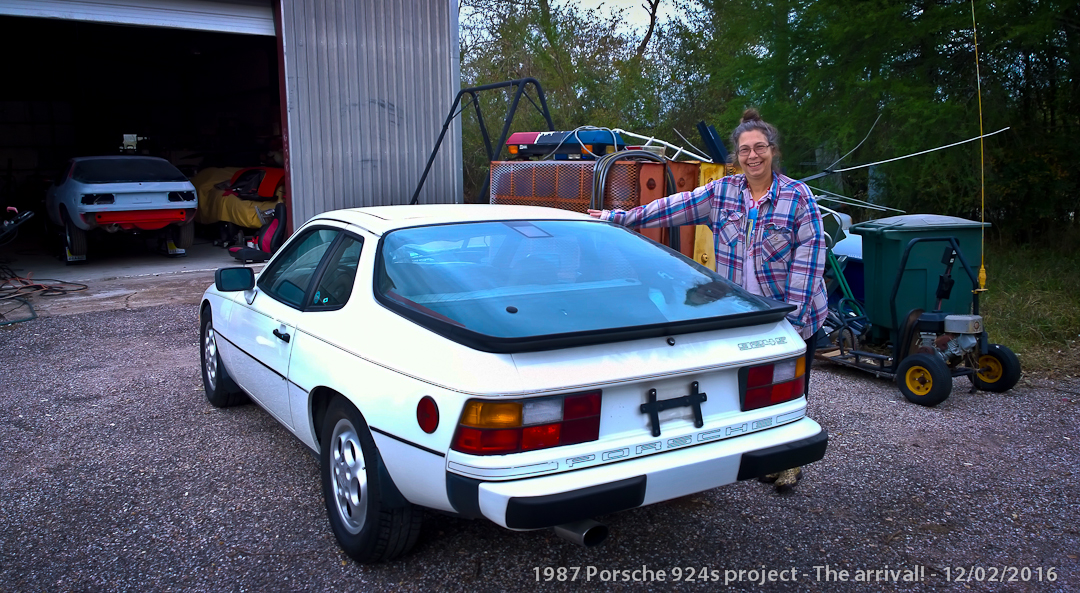
12/02/2016 - A large truck arrived this morning at 6:30am with the new Gas Monkey Porsche 924s tied down to the back. It arrived, safe and sound, with no damage and it started right up on the first turn of the key... My wife is sort of proud of her new toy - I put it in her name because we have way too many cars sitting around here in my name. I promised her a Corvette many years ago and I have yet to make good on that promise, but at least she has a vintage Porsche she can call her own...
Now I am trying to get an appointment to deliver this car to the highly acclaimed local Porsche shop that is usually so damn busy they can't answer the phone... The lifter tick, upon further inspection, is probably one of two things - a collapsed lifter or a bent valve on cylinder #3. Either way, it needs to be treated carefully and delivered to a shop who can fix this with little fuss and fanfare and get it back on the road where it belongs.
We also noticed that the brakes need some love, some serious love. Like turning all of the brake rotors, new pads and bleeding the brakes to get rid of the BLACK brake fluid... The tires appear to be relatively new, so we won't have to worry about a new set of tires any time soon. It needs to be caught up on its service history as well - things like a new timing belt, oil change to all Royal Purple fluids front and rear, an extensive lube job and a few other little things here and there. Once done, it should be good for another 5 to 10 thousand miles...
We are looking forward to taking her out on the highway and getting familiar with driving a stick shift car again!
It's been so cold and rainy, other work in the barn has come to a literal stand-still... I think I need a new heater for the barn!
================================================================================================================================
I will add photos and commentary as they happen, as they are completed and when I move on to the next part of the project... Keep checking back on the progress as this turns into a fun car we can take out to the track...
(updated 11/27/2016)